Overview #
Laparoscopy, or the insertion of an endoscope into the peritoneal cavity, was first described at the beginning of the 20th century. Urologists and gynecologists were pioneers in the development of laparoscopy, where advances in equipment and surgical techniques went hand in hand. The “Laparoscopic Revolution” followed the first descriptions of a completely laparoscopic operation in the late 1980s, the laparoscopic cholecystectomy. Significant patient benefits were realized, in terms of decreased post-operative pain and morbidity, shorter hospital stay, and earlier return to work following laparoscopic cholecystectomy compared with open or conventional cholecystectomy. The current era in surgery is one of “Laparoscopic Evolution”, where most surgical procedures are performed partially (laparoscopic-assisted) or completely laparoscopically. However, the scientific evidence of benefits to patient and society, over standard open techniques, is often lacking.
Contents #
Laparoscopic Equipment
Laparoscopes
Video
Light Source
Gas Insufflator
Laparoscopic Instruments
Operating Table Set Up
Handling Laparoscopic Instruments
Basic Laparoscopic Techniques
Pneumoperitoneum
Basic Laparoscopic Skills
Laparoscopic Suturing
Laparoscopic Equipment #
While we await the results of prospective trials to determine the benefits of specific procedures, one thing is certain- laparoscopic surgery is here to stay, and surgeons of the 21st century must possess basic laparoscopic skills.
Videoendoscopic surgery, or the use of fibreoptic scopes, cameras and video monitors to perform surgery in an existing or potential anatomic space, has permeated most of the surgical sub-specialities. Neurosurgeons perform endoscopic surgery within the ventricles. Plastic surgeons perform endoscopic carpal tunnel release in the wrist and also do some facial cosmetic procedures endoscopically. Some surgeons are using the endoscopic approach in the neck for thyroid and parathyroid surgery. Vascular, cardiovascular and thoracic surgeons are also using endoscopic techniques to approach lungs, aortic aneurysms, peripheral vessel and coronary artery bypass grafts.This chapter focuses on basic equipment and techniques used in endoscopic surgery of the peritoneal cavity, ie. laparoscopic surgery.
Laparoscopic Equipment #
Quality, functional equipment is vital to the performance of a successful and efficient laparoscopic operation. The surgeon must be familiar with the equipment and must be able to troubleshoot equipment problems. In fact, the operating room nurses and all surgical personnel should be familiar with the equipment, and the formation of a specialized “Laparoscopic Team” is likely the most efficient solution.
Laparoscopes #
The standard laparoscope in general surgery is 10 mm in diameter, whereas gynecologists often use slightly smaller 7 mm scopes. The angle of the lens may be 0 degree (looking end-on) or angled at 30 degrees or greater. Most surgeons find the 30 degree scope provides an excellent view for basic laparoscopic procedures. Recently, smaller “mini-laparoscopes” of 1.5 to 3.5 mm in diameter have been introduced, which may be of either fibre optic or rod-lens construction.
Video #
Today, the term `laparoscopy’ implies `videolaparoscopy’, or the attachment of a video camera to the lighted telescope into the abdomen. Initially, laparoscopy was performed with the surgeon looking directly into the eyepiece of the scope, held inside the patient’s abdomen. Now virtually all laparoscopy is videolaparoscopy where the image is displayed on a video monitor. Hence there is surgical hand-eye separation which contributes to the technical difficulty of laparoscopic surgery.
It is often advantageous to have two monitors, one on each side of the operating table. The specific position of video monitors depends on the operation. In general the monitors are located on the pathology side, and the surgeon stands across the table, facing the video. The video cassette recorder, video monitor, light source and gas insufflator are usually housed in a single tower (Figure 7.1).

Light Source and Gas Insufflator #
Light Source
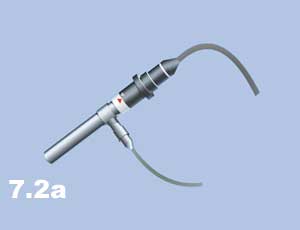
Early laparoscopes used an incandescent light bulb at the tip of the scope. The development of fiber optics has led to the movement of the light source and its controls to a separate and distant unit connected to the endoscope with a light cord (Figure 7.2a)
Gas Insufflator #
Gas insufflation of the peritoneal cavity converts the potential space into an actual one, several litres in size. Gas flow is continuous with an adjustable rate (up to 6 – 10 L/min) and maximum pressure control (maximum 12-15 mmHg recommended).
Carbon dioxide is the most commonly used insufflation gas since it is rapidly absorbed into the circulation, thus minimizing the potential for gas embolism. Nitrous oxide has been used under local anesthesia since it is purported to be less irritating to the peritoneum. The disadvantage of nitrous oxide is that it supports combustion, preventing the use of cautery, and thus limiting its usefulness as an insufflation gas.
Special laparoscopic retractors of the anterior abdominal wall (“abdominal wall lifters”) permit creation of a potential space without continuous gas insufflation, theoretically decreasing the potential for gas embolism. Abdominal wall lifters have been advocated when large blood vessels such as hepatic veins are being transected, but there is no good evidence to support their use.
Laparoscopic Instruments #
Laprascopic Instruments
Many laparoscopic instruments are modifications of standard surgical instruments. The tips are finer and are mounted on long (30 cm) shafts to pass through the abdominal wall to the operative site. Other laparoscopic instruments are unique in that they do not have counterparts in open surgery (e.g. L-hook and spatula cautery instruments). Instruments which rely on sharp surfaces may be either reusable or disposable. Disposable instruments have the advantage of staying sharper but the disadvantage of higher cost.
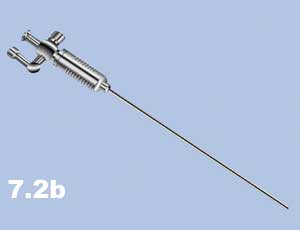
a) Veress Needle. A needle for obtaining closed access to the peritoneal cavity in order to create a pneumoperitoneum. It has a spring-loaded obturator which retracts to expose the sharp tip while there is resistance passing through the abdominal wall, and advances over the needle tip upon entering the peritoneal cavity (Figure 7.2b).
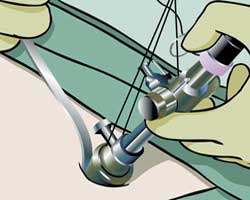
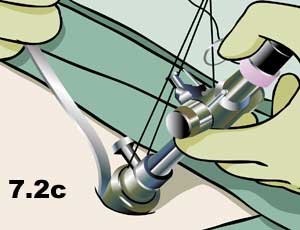
b) Hasson Cannula. A device for establishing open access to the peritoneal cavity. This consists of a 10 cm blunt trocar and 11 mm cannula which can be fastened to the abdominal wall to prevent gas leakage or cannula slippage (Figure 7.2c).
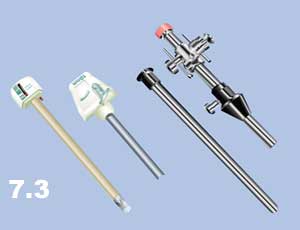
c) Trocars and Cannulas. Fundamental tools of laparoscopic surgery which provide and maintain access to the peritoneal cavity for the insertion of operating instruments. A cannula is a hollow tube of various diameters (3-20 mm, commonly 5 or 11 mm). This is placed through the abdominal wall with a sharp inner trocar which is then removed. Trocars are either metal (reusable) , plastic (disposable), or a hybrid of the two with a reusable cannula and a plastic trocar (Figure 7.3).
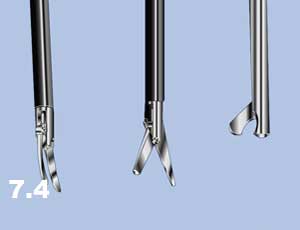
d) Scissors. Scissors are used for sharp or blunt dissection, with or without electrocautery. Varieties include straight, curved and hook scissors. Hook scissors are designed so that the tips come together prior to the cutting surface so that a tubular structure can be grasped and then held away from surrounding tissue for safe cutting (Figure 7.4).
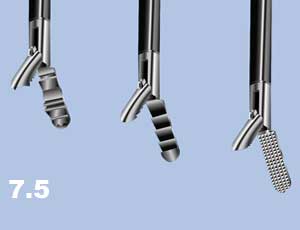
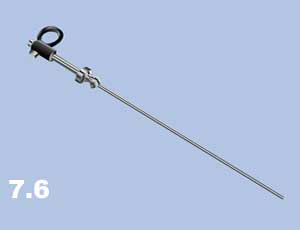
e) Graspers. Numerous different types of graspers are available for grasping tissue or specimens such as gallstones. These can be traumatic or atraumatic (with or without teeth), and with or without a ratcheted handle that keeps the jaws closed without manual pressure (Figure 7.5). The tripod grasper is useful for grasping a thick-walled gallbladder (Figure 7.6).
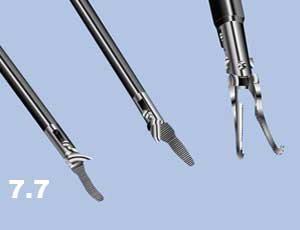
f) Dissectors. Multiple different types with similar designs to open instruments. Fine straight dissector, Maryland and Mixter are shown here. (Figure 7.7)
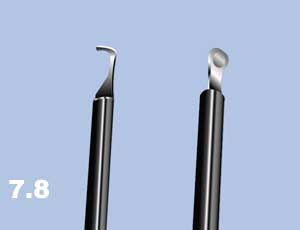
g ) Cautery Tips. A variety of shapes of cautery tips are available for monopolar electrocautery dissection. The most common varieties are the L-hook and spatula (Figure 7.8).
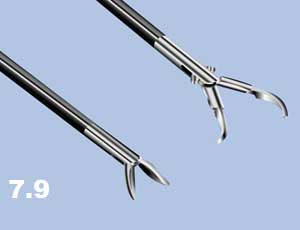
h) Needle Drivers. Laparoscopic needle drivers are similar to standard needle drivers (Figure 7.9). As opposed to most instruments which have pistol-grip handles, needle drivers usually have co-axial handles to facilitate “palming” the instrument (Figure 7.10).

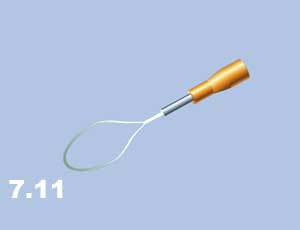
i) Endoloop. Pre-tied ligature used for controlling blind-ended structures such as the appendix. An endoloop may also be placed over the end of a structure previously clipped and cut where the clip may be inadequate alone (i.e. large cystic duct) (Figure 7.11).
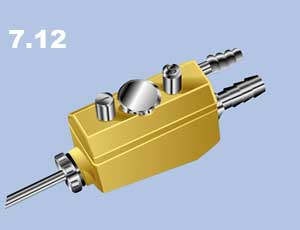
j) Suction and irrigation device. Important instrument for keeping the operative field clean and dry (blood is magnified on the screen, and the dark colour not only absorbs the light but directly obscures anatomy) (Figure 7.12).
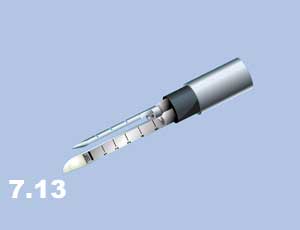
k) Endoscopic stapler. Similar uses as in open surgery, but requires a 12 mm cannula (Figure 7.13). This fires two double rows of staples and cuts between them.
Operating Table Set-Up #
Operating Table Set-Up
Sterile drape the patient widely to maximize flexibility of port site positions. Port sites represent a finite number of views of the operative field. Choose them wisely but do not feel restricted in adding extra ports as needed. However, extra ports actually add little extra morbidity. Several animal and clinical studies have concluded that the physiologic stress of one long incision appears to be greater than that of several short incisions of the same total incision length.
Plan position of patient, surgeon, assistant, scrub nurse, and videolaparoscopic equipment, and organize the “cables” accordingly. A suction and irrigation device should be immediately available for any laparoscopic case i.e. setup, and turned on.
Handling Laparoscopic Instruments #
Handling Laprascopic Instruments
Most laparoscopic instruments have finger ring or pistol grips, and are generally handled similar to standard surgical instruments.
General Principles:
a) Two-Handed Technique. It is at least as important in laparoscopic as in open surgery for the surgeon to use both hands simultaneously. The principle of traction and counter-traction requires constant repositioning of the non-dominant hand.
b) Camera Operator. This critical member of the laparoscopic team functions as the surgeons’ eyes. A good camera person is essential for consistent visualization throughout the procedure. The structure or organ which the surgeon is manipulating should be kept in the centre of the screen. If the surgeon is satisfied with the view, the camera should be kept still. Any camera movements should be small, and should be made slowly and smoothly, in order to avoid inducing motion sickness in those watching the monitor. The black cord coming off the end of the camera sets the “horizon” of the view, and therefore should always be kept down, toward the ground so that the surgeon remains oriented to the anatomy (Figure 7.14).

The gray light cord entering the side of the angled laparoscope adjusts the direction of the angle. The camera angle is always looking away from the cord.
c) Instrument Changes. These are time consuming and should be minimized. Novice laparoscopists should have their instruments escorted by the camera from the port to the target structure to be operated upon. Experienced laparoscopists can triangulate the ports in order to safely move the instrument in and out of the abdomen without moving the camera, except perhaps to zoom out slightly to view the inserted instrument. An important job of the assistant is to hold the cannula steady while the surgeon inserts the instrument.
Basic Laparoscopic Techniques #
Basic Laprascopic Techniques
The key to success and consistency in performing any laparoscopic procedure, including these basic techniques, is to establish a routine.
Pneumoperitoneum
The pneumoperitoneum is the laparoscopists’ workspace. Without the distension of this potential space, laparoscopic surgery is not possible. There are two basic techniques of establishing access to the peritoneal cavity and creating a pneumoperitoneum.
Proponents of the Veress technique argue that it is quick and easy. Surgeons in favour of the Hasson technique counter that it is safer since everything is done under direct vision, and that the rapid insufflation makes up for the extra time required to insert a Hasson cannula compared with a Veress needle. Some surgeons selectively use either technique, using the Veress needle in uncomplicated cases and the open technique when adhesions from previous surgery are anticipated.
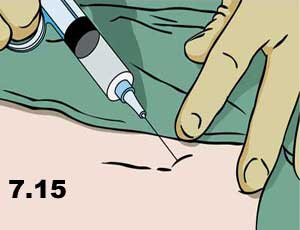
- Veress Needle (Closed Technique)
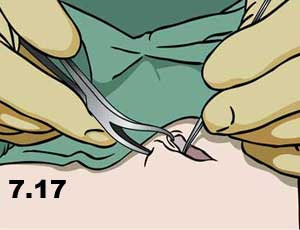
- Infiltratelocal anesthetic below the umbilicus (Figure 7.15).
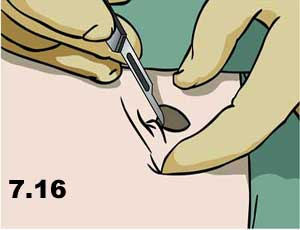
- Make a skin incision the size of the port to be inserted (Figure 7.16).
- Grasp the fascia with a hemostat or towel-clip and retract upwards (Figure 7.17).
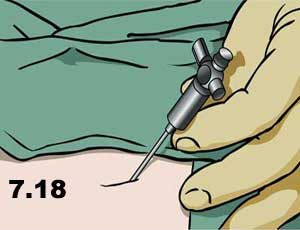
- Insert the Veress needle through all layers of the abdominal wall; there should be two distinct “pops” (Figure 7.18).
- Tests for intraperitoneal location:
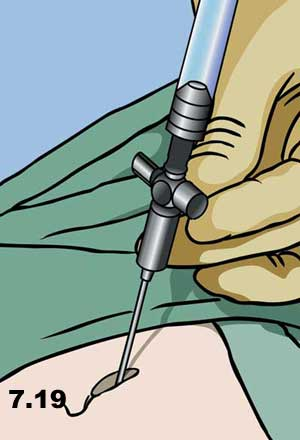
- Aspirate. First aspirate (for blood or bowel content, which would identify a serious trocar-entry complication), then flush with 5 cc saline and aspirate again (Figure 7.19).
- Hanging Drop. Place a drop of saline in the hub of the Veress, then lift the abdominal wall. If the Veress is in place the negative intra-abdominal pressure should pull the drop inwards, and disappear inside the needle.
- Insufflate with CO2, first on low flow then increase when sure that the flow is in the intraperitoneum. This location can be confirmed by percussing over the liver (normal dullness is lost due to the pneumoperitoneum) (Figure 7.20).

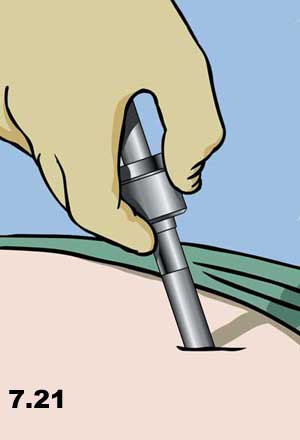
- Insert the first sharp trocar, with the side port open so that the “hiss” of escaping air can be heard when the pneumoperitoneum is penetrated (forward pressure on the port is immediately released, and the side port is closed to prevent loss of the pneumoperitoneum) (Figure 7.21).
2. Hasson Cannula (Open Technique)
- Infiltrate local anesthetic below the umbilicus.
- Make a skin incision 12-15 mm long for a 10 mm Hasson. The thicker the abdominal wall, the longer the incision will be.
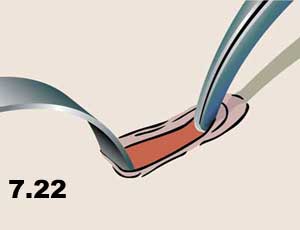
- Grasp the fascia with a hemostat or towel-clip and retract upwards (Figure 7.22).
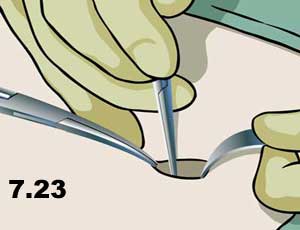
- Make a 10 mm incision in all layers of fascia (the linea alba) (Figure 7.23).
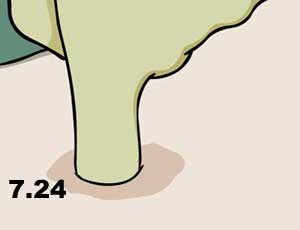
- Open the peritoneum (either sharply between two hemostats, or bluntly with the gloved finger) (Figure 7.24).
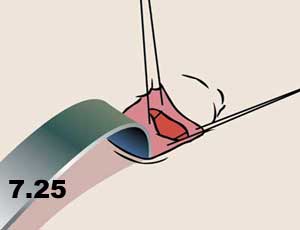
- Place “stay sutures” in the fascia which will be used to achieve a tight seal between the abdominal wall and the cannula to prevent gas escape. Place the sutures so that they can be used to close the fascial defect after the procedure (to prevent a trocar site herniation) (Figure 7.25).
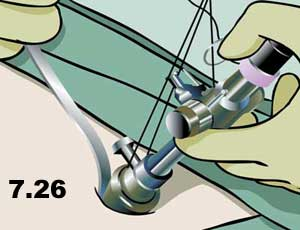
- Insert the Hasson using an S-retractor to visualize the path into the peritoneal cavity (think of this as “intubating” the peritoneal cavity). (Figure 7.26).
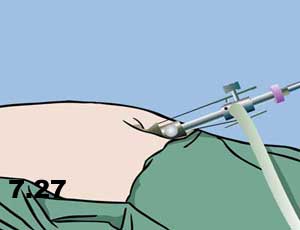
- Fasten the Hasson in place with the stay sutures and insufflate with CO 2. High flow can be used immediately as the intraperitoneal location is visualized directly (Figure 7.27).
Basic Laparoscopic Skills #
Basic Laprascopic Skills
As with traditional surgery, the basic principles of laparoscopic surgery are traction and counter-traction, and meticulous sharp and blunt dissection. The difference between the two is the very fine hand movements required for laparoscopic dissection, as instruments are restricted in movement around a fulcrum at the abdominal wall.
Very basic surgical techniques such as knot-tying therefore become much more difficult. In fact, many surgeons would realistically consider laparoscopic intracorporeal knot-tying an advanced laparoscopic technique. It is definitely a prerequisite skill for advanced laparoscopic surgery (i.e. in general surgery, anything beyond cholecystectomy, appendectomy, or inguinal hernia repair).
Due to the difficulty of laparoscopic suturing, novel techniques have developed for laparoscopic hemostasis (e.g. “endoloops”) and other traditional techniques have adapted to laparoscopic surgery. Only those skills which are important or unique in laparoscopic surgery will be described in this section. These skills can be practiced in dry (inanimate) and wet (animate) labs.
a) Transfer. Hand-to-hand transfer of a needle from right hand to left hand and vice versa. Hand-over-hand movements required to “run the bowel” can be simulated by a piece of string in a laparoscopic practice box.
b) Clipping a Vessel. The basic principle of having the tips of the instrument in view at all times is paramount. The surgeon must see the tips of the clip during application (Figure 7.28 – 7.30).
.
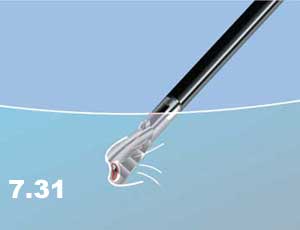
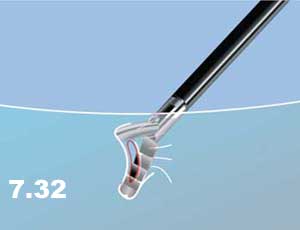
c) Dissection. Sharp or blunt dissection with or without cautery, as in open surgery (Figures 7.31 & 7.32)
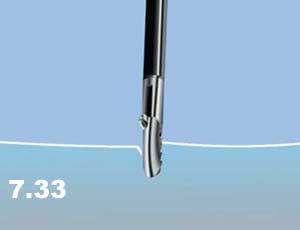
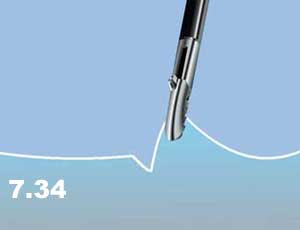
In addition, tissues are picked up, lifted away from surrounding structures, coagulated, and then stripped away to expose the underlying structure (Figures 7.33 & 7.34)
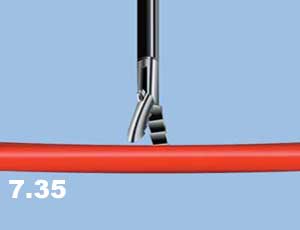
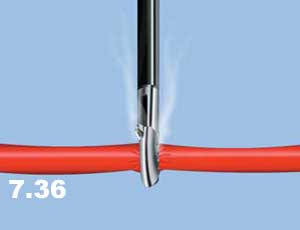
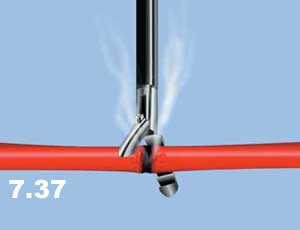
Small vessels can also be grasped, cauterized, and then sharply divided with scissors (Figures 7.35 – 7.37).
d) Applying an Endoloop
- “Backload” the endoloop into the reducer.
- Insert the endoloop into the abdomen.
- Place the loop over the target structure to be ligated.
- Grasp the target with a ratcheted instrument in the other hand, and provide counter-traction (the assistant holds this instrument so that the surgeon can use two hands on the endoloop).
- Snap off the end of the endoloop, place the tip of the holder on the desired position of the ligature and smoothly pull the suture to snug down the loop.
- Cut the suture and remove the endoloop holder. Small vessels can also be grasped, cauterized, and then sharply divided with scissors.
Laparoscopic Suturing #
Laprascopic Suturing
Curved needles are commonly used for suturing in open surgery. Some surgeons prefer short, straight needles or ski-tip needles when they are learning laparoscopic suturing techniques.
1. Intracorporeal Knots.
Intracorporeal knots are laparoscopic instrument ties formed completely within the peritoneal cavity. This is essentially an instrument tie, as in open surgery, but it is much more difficult to do laparoscopically. Due to the technical difficulty of this basic laparoscopic skill, many surgeons have abandoned it in favour of the easier extracorporeal suturing. As with any skill, intracorporeal knot-tying can be mastered with practice.
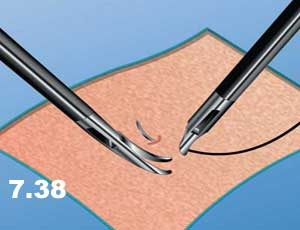
- Insert the suture (trimmed to a length of about four to six inches) into the abdomen and grasp it in the needle holder (positioned at a right angle to the jaw of the needle holder)
- Pass the needle through the tissue (Figure 7.38)
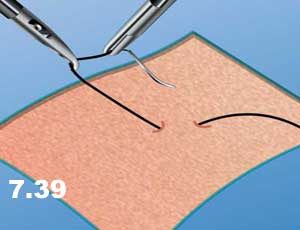
- Pick up the needle with the second instrument (second needle holder or a swan-neck grasper) and turn over 180 degrees so that the point faces the direction from which the needle came (to reduce the risk of inadvertent injury with the needle while pulling the suture through (Figure 7.39).
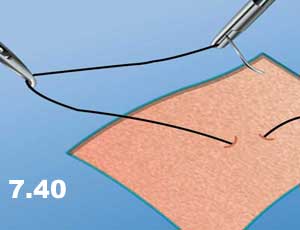
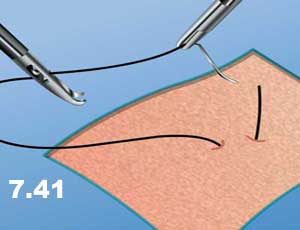
- Pull the suture though the tissue in the direction of the needle path (to minimize tissue trauma – as in open surgery) leaving a “tail” of one or two inches of suture protruding from the tissue (Figure 7.40).
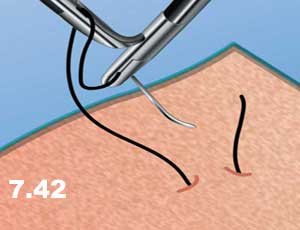
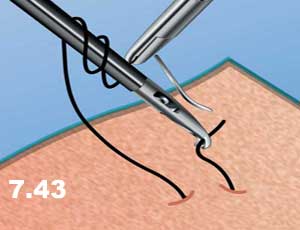
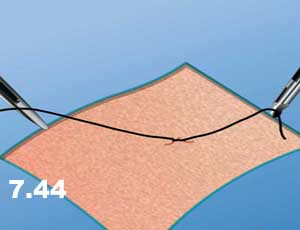
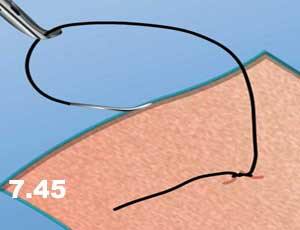
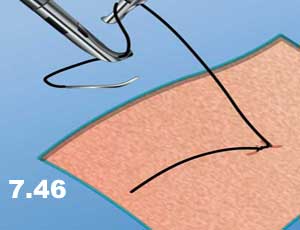
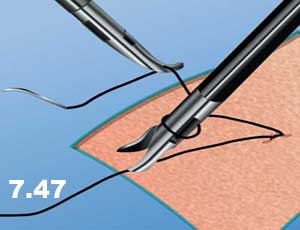
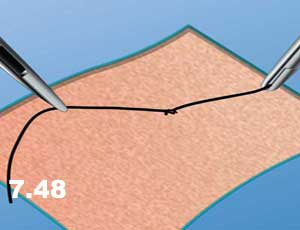
- Grasp the suture just beyond the swage (Figure 7.41) and a C-shaped curve is formed with the suture. The needle end of the suture is then wrapped around the second instrument twice (Figure 7.42) , the tail is then grasped (Figure 7.43) , and the knot is laid down flatly, as with an open instrument tie (Figure 7.44).
- Tighten the first knot and then hand the suture to the opposite instrument and tie a single knot in the opposite direction, resulting in a square knot. At least three knots are usually placed (Figures 7.45 – 7.48). Cut the suture and remove excess.
2. Extracorporeal Knots.
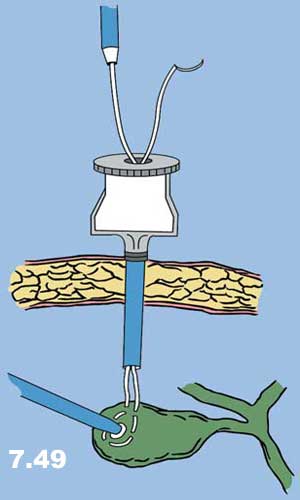
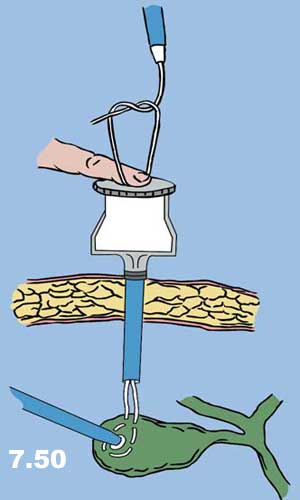
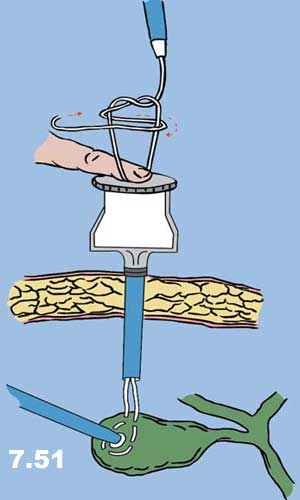
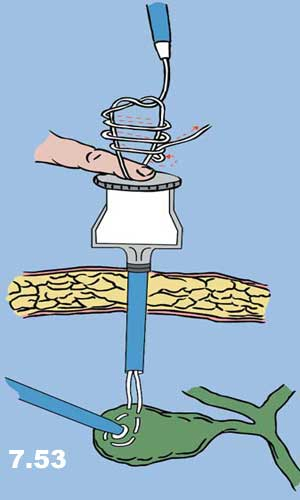
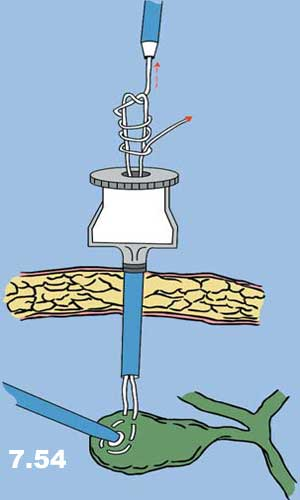
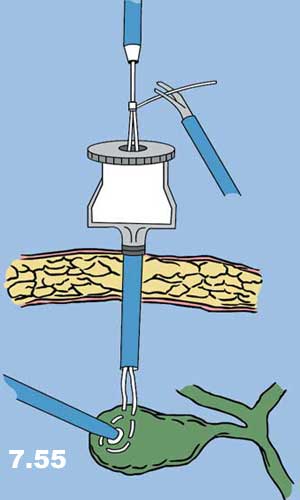
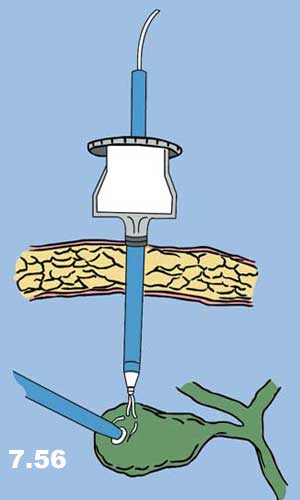
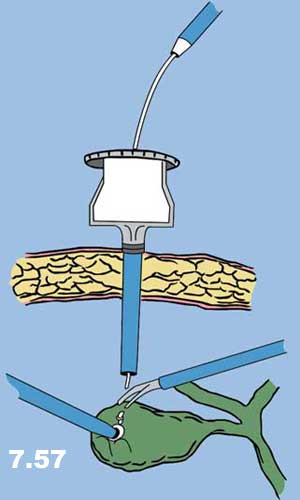
As the name implies, extracorporeal knot-tying involves the tying of knots outside of the body: The suture and needle are passed into the abdomen, placed through the tissue, pulled out of the abdomen, tied, and pushed back into the abdomen and snugged down. There are two basic types of extracorporeal knots: extracorporeal slip knots and extracorporeal surgeon’s knots (Figures 7.49 – 7.57).
- Insert the suture into the abdomen and grasp it in the needle holder (positioned at a right angle to the jaw of the needle holder).
- Pass the needle through the tissue.
- Grasp the suture behind the swage and pull the needle and the suture back into the trocar sheath through which it was inserted.
- Tie a single knot, while the assistant holds a finger over the trocar sheath opening in order to prevent the escape of gas.
- Use a knot-pusher to push the knot down through the cannula, and onto the tissue (the knot-pusher should be considered an extension of the surgeon’s finger, used to push knots down in open surgery). If the surgeon does not wish to use a slip knot, then a surgeon’s knot is pushed down, and two or three additional knots are tied and pushed down in succession.
- Cut the suture and remove excess.