Description #
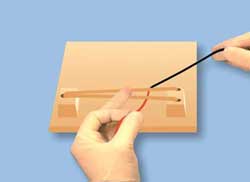
This unit is intended for training of undergraduate, clerkship, and first year of the core residency program in order to learn the practical aspects of Knot Tying Techniques.
Learning Objectives #
At the end of this unit, students should be:
1) introduce and get familiar with Types of Surgical Knots
2) able to perform:
a) two-handed ties
b) one-handed ties
c) surgeon’s or friction knot
d) sliding knot
e) instrument tie
f) friction knot with instrument tie
Overview #
Knot tying techniques are the most basic, yet the most essential surgical skills. All that is required are the surgeons’ hands and suture material. Hand-tied knots are applied in many tasks such as hemostasis, anastomosis between hollow organs (e.g. bowel or blood vessels), and wound closure. Therefore, it is important for a surgeon to master a variety of surgical knots and knot tying techniques. There are two important components of knot tying skills: quality and speed. High-quality knots are square, tight, and placed without trauma to the tissue. Quality and speed are inter-related and one should not be sacrificed for the other. Concentration should be placed first on tying quality knots, followed by practice to increase speed.
Contents #
Types of Surgical Knots
Tying Technique
Two-Handed Ties
One-Handed Ties
Surgeon’s pr Friction Knot
Sliding Knot
Instrument Tie
Types of Surgical Knots #
Surgeons generally use four basic knots:
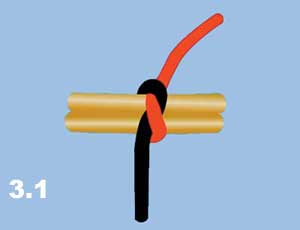
Simple Knot. An incomplete, one-unit knot (Figure 3.1).
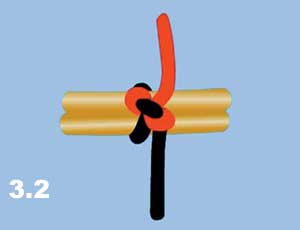
Granny Knot. A two-unit knot that is completed by repeating identical steps. It is a sliding knot (slips under pressure) and therefore should only be used for purposes such as approximation of high tension wounds (e.g. lateral thoracotomy) and should be completed with a third mirror-image knot that makes it square (Figure 3.2).
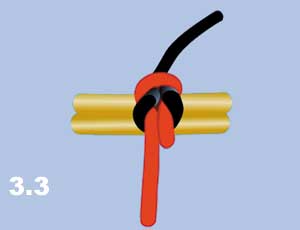
Square Knot. A two-unit knot that is completed with two mirror-image simple knots. This is a very strong knot and is by far the knot most often used in surgery (Figure 3.3).
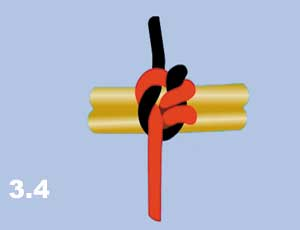
Surgeons or Friction Knot. The first unit of this knot is a double loop and the second unit is a single loop mirror-image. It is used as a tension tie and is a very safe technique for beginners (Figure 3.4).
NB: It is always preferable to make three or more knots depending on the quality of the material and size of the suture. Smaller-sized sutures and synthetic materials need more knots. Generally, use three knots for silk, 4-5 knots for synthetic absorbable, and six knots for synthetic monofilament non-absorbable materials.
Tying Technique #
Tying Techniques
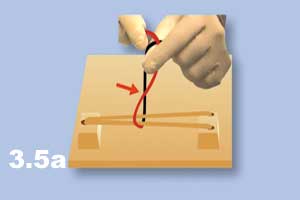
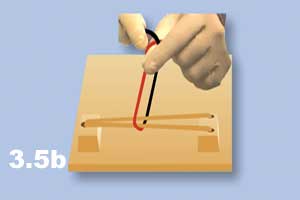
Techniques for tying a surgical knot can be divided into two-handed, one-handed and instrument tying. The suture is subdivided into two segments which are called the active and passive strands. The active strand is the segment of the suture that is manipulated and the passive strand is the one that is manipulated on. In a two-handed knot tying technique, the active strand is always the closest one to the operator and it should be kept in the right hand. After completion of the knot it should be pulled toward the assistant in order to make the knot flat. If the active strand is not in the right hand, the strands may cross when the loop is formed (Figure 3.5a). In this case, it is impossible to flatten and hence affects the quality of the knot. Figure 3.5b shows the correct configuration.
Two-Handed Ties #
Grasp both segments of the thread with the middle, ring, and little fingers and keep the index finger and the thumb free for manipulation. (Figure 3.6).
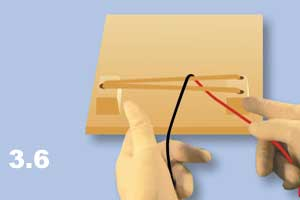
Unit One- Active strand (red) toward the operator (for right-handed people, the active strand or segment is in the right hand).
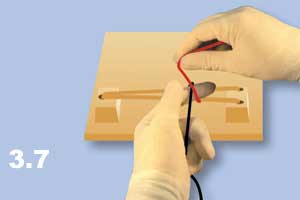
a) Form a loop around the index finger by bringing the active strand over the top of the index finger (Figure 3.7).
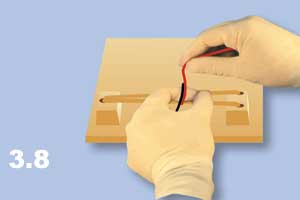
b) Pinch the index finger and the thumb (Figure 3.8).
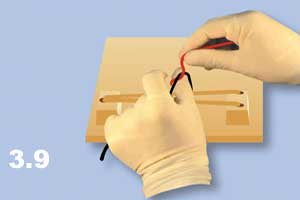
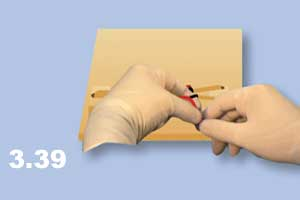
c) Swing the pinched index finger and the thumb from under the loop to the opposite side of the loop (Figure 3.9).
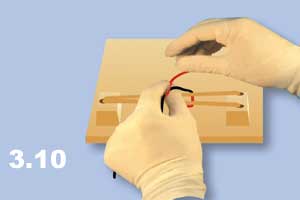
d) Throw the active strand over the loop and grasp it between the pinched index finger and thumb (Figure 3.10).
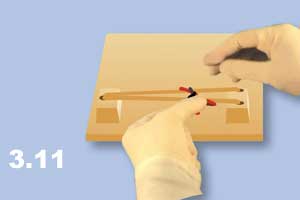
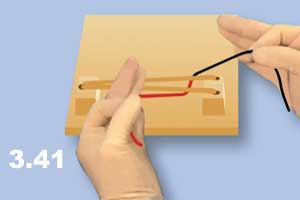
e) Pass the active strand through from under the loop (Figure 3.11).
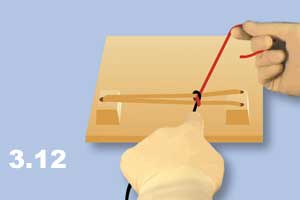
f) Grasp the active thread from under the loop and put the knot down with the help of the index finger (Figure 3.12).
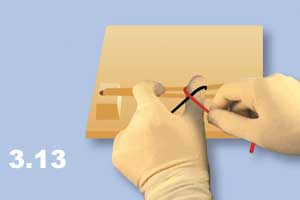
Unit Two – Active strand opposite the operator.
a) Move the left thumb inside the passive strand and form a loop around the thumb by bringing the active strand over the top of the thumb (Figure 3.13).
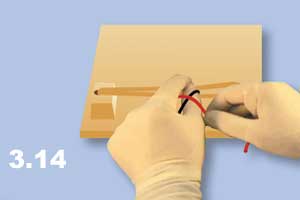
b) Pinch the thumb and the index finger together (Figure 3.14).
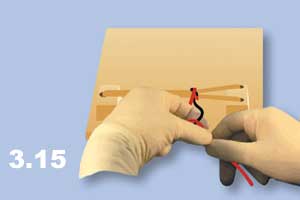
c) Swing the pinched thumb and index finger from under the loop to the opposite side and grasp the active strand (Figure 3.15).
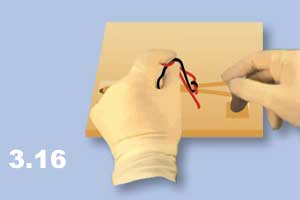
d) Pass the active strand through the loop (Figure 3.16).
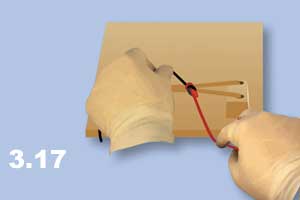
e) Grasp the active thread from under the loop and put the knot down with the help of the index finger (Figure 3.17).
NB: In the two-handed tie, the left-hand takes an active part in setting up the loop and manipulating the active strand for a right-handed person. If only unit one is applied, it is a simple knot; if two identical units are applied, it is a granny knot; if both units one and two are applied, it is a square knot.
One-Handed Ties #
One-Handed Ties
Unit One – Active strand (red) toward the operator (for right-handed people, the active strand or segment is in the right hand).
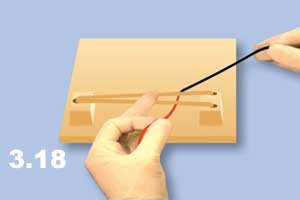
a) Tighten the knot with the left index finger (Figure 3.18).
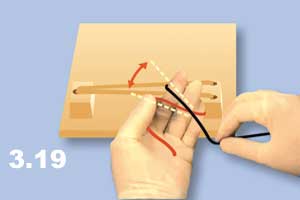
b) Make a loop around three fingers with the passive (black) strand over the top. Keep the angle indicated in figure 3.19 as wide as possible.
c) Flex the middle finger, hook the active (red) strand and grasp it between the middle and ring fingers (Figure 3.20).

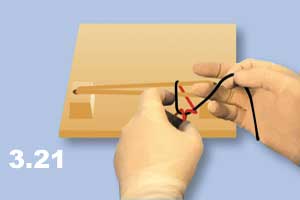
d) Sweep the active (red) strand from under the loop by holding it between the middle and ring fingers (Figure 3.21).
e) Tighten the knot with the left index finger (Figure 3.22).

Unit Two – Active strand opposite the operator.
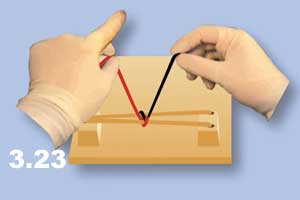
a) Grab the active (red) strand with the thumb and middle finger (Figure 3.23).
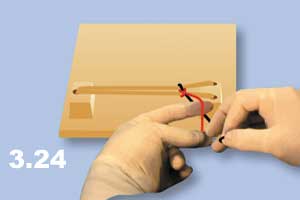
b) Make a loop around the index finger by moving the index finger under the active (red) strand and bringing the passive (black) over the top of the index finger (Figure 3.24).
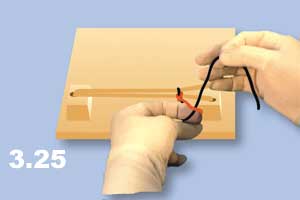
c) Flex the left index finger catching the active (red) strand with the dorsum of the finger (fingernail) (Figure 3.25).
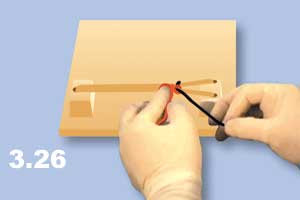
d) Sweep the active strand through the loop with the help of the index finger (Figure 3.26).
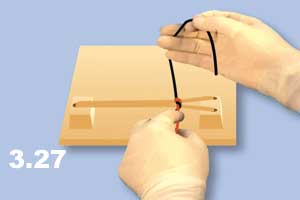
e) Grasp the active strand from under the loop with the same hand and tighten with the index finger (Figure 3.27).
NB: In the one-handed-tie, either the right or left hand can be used to set up the loop and manipulate the active strand. Therefore, with the one-handed technique, the square knot can be formed by applying two different units or using the same unit with both right and left hands.
Surgeon’s or Friction Knot #
Surgeon’s or Friction Knot
Sometimes it is challenging to keep the first knot in place while placing the second knot. The reasons may include the nature of the thread or the tensile strains pulling the wound in the opposite direction. In order to avoid loosening of the first knot, one of the strands should always be kept with a slight tension while the second knot is completed. Surgeon’s or friction knots can also be used to keep the first knot in place during the placement of the second knot.
Steps:
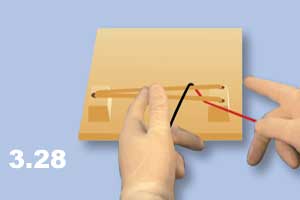
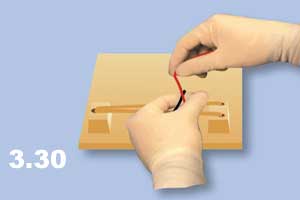
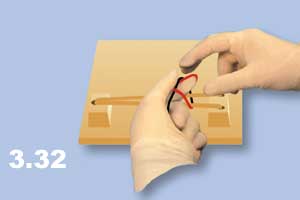
a) Repeat unit one of the two-handed knot tying techniques (Figures 3.28 – 3.32).
- Form a loop around the index finger.
- Pinch the index finger and the thumb.
- Swing the pinched index finger and the thumb from under the loop to the opposite side of the loop.
- Throw the active strand over the loop and grasp it between the pinched index finger and thumb.
- Pass the active strand through from under the loop.
- Grasp the active strand from under the loop and do not pull down.


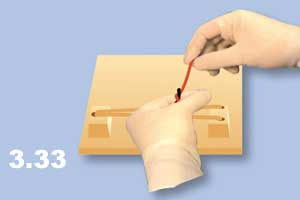
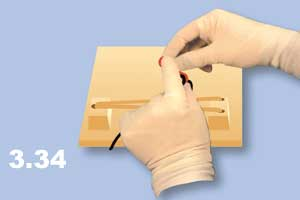
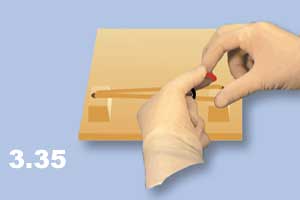
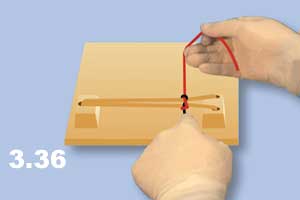
b) After the completion of the first loop around the index finger, make a second loop again around the index finger (Figures 3.33 – 3.35) and only then pull the knot down (Figure 3.36).
b) After the completion of the first loop around the index finger, make a second loop again around the index finger (Figures 3.33 – 3.35) and only then pull the knot down (Figure 3.36).
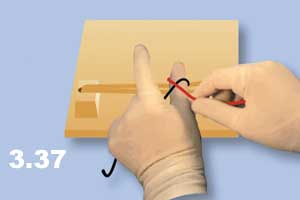
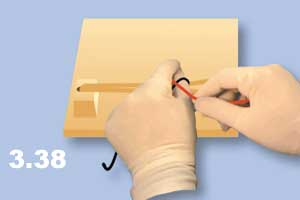

Note: for all diagrams, the active strand is red and the passive strand is black.
Sliding Knot #
Sliding Knot
Sliding knots are used when the tension is extremely high for approximation of the wound (e.g. approximation of the ribs after a thoracotomy).
Steps:
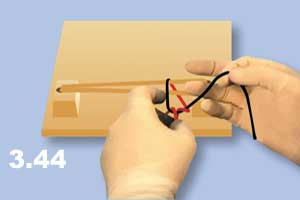
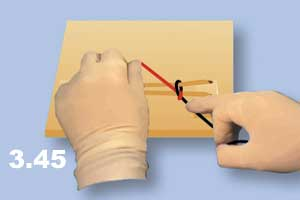
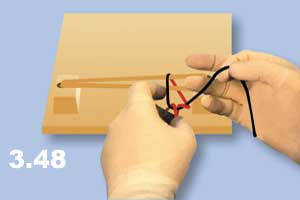
a) Complete the first unit of a one-handed technique. (Figures 3.41 – 3.45).
- For this knot, grasp the strands or segments of the suture with thumb and index finger and leave the three fingers, namely middle, ring and little fingers free for manipulation.
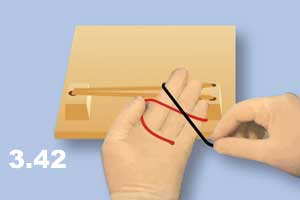
- Make a loop around the three fingers by moving the passive (black) strand over the top.
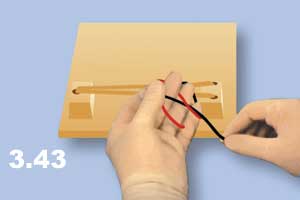
- Flex the middle finger to pull the active strand and grasp between the middle and ring fingers.
- Sweep the active strand from under the loop holding the active strand between the middle and ring fingers.
- Pull the knot slightly with the left index finger, but do not tie it down.
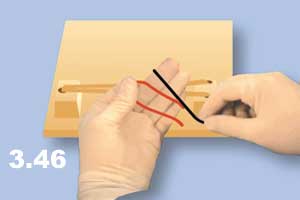
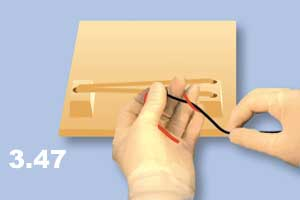
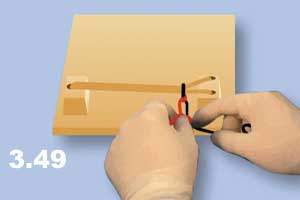
b) Repeat the same unit again and avoid overlapping the two knots (Figures 3.46 – 3.49)
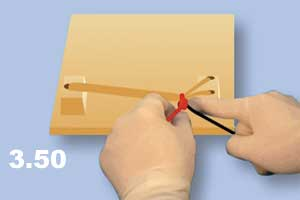
c) Pull only one (passive black) strand towards oneself (Figure 3.50).
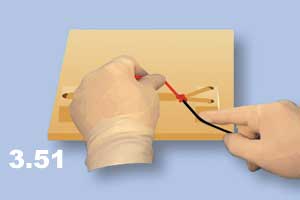
d) When the wound is approximated to satisfaction, pull the second (active red) strand in the opposite direction to lock the knot (Figure 3.51).
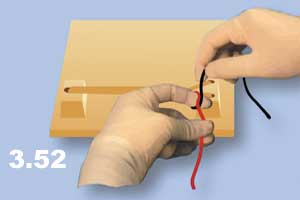
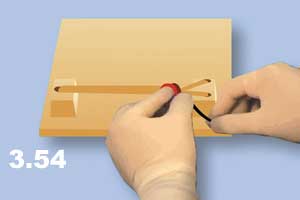
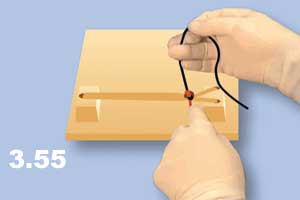
e) Complete the alternate unit of a one-handed technique to square and secure the knot (Figure 3.52 – 3.55).
- Grasp the active (red) strand with thumb and middle finger.
- Make a loop around the index finger by moving the index finger under the active (red) strand and bringing the passive (black) over the top of the index finger.
- Flex the left index finger catching the active (red) strand with the dorsum of the finger (fingernail).
- Sweep the active strand through the loop with the help of the index finger.
- Grasp the active strand from under the loop with the same hand and tighten with the index finger.

Note: for all diagrams, the active strand is red and the passive strand is black.
Instrument Tie #
Instrument Tie
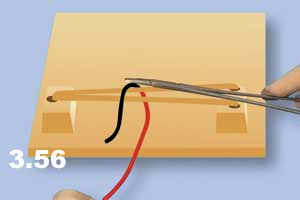
This technique is useful for the economy of suture materials or when a surgeon is working alone. This technique should be used only for superficial wounds.
a) Hold needle parallel with incision (Figure 3.56).
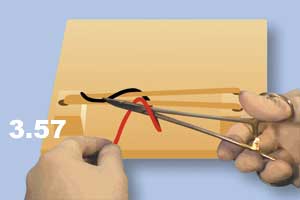
b) Form a loop around the instrument with the active (red) strand and grasp the end of the passive (black) strand (Figure 3.57).
c) Pull the passive strand under the loop (Figure 3.58).

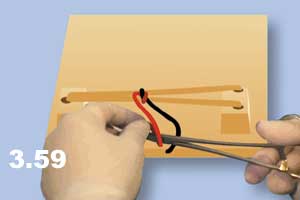
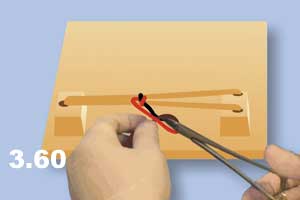
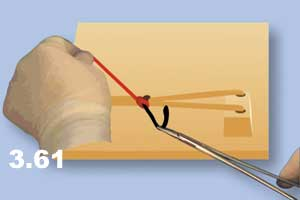
d) Repeat the maneuvers described and form a loop in the opposite direction to form a square knot (Figures 3.59 – 3.61).
Note: for all diagrams, the active strand is red and the passive strand is black.
Friction Knot with Instrument Tie #
Friction Knot with Instrument Tie
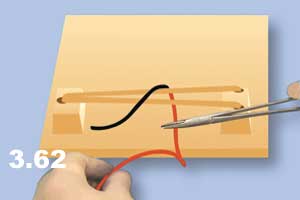
a) Hold needle holder parallel with incision (Figure 3.62).
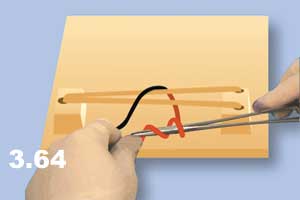
b) For this technique, make a double loop around the instrument with the active (red) strand and grasp the end of the passive strand (Figures 3.63 – 3.64).

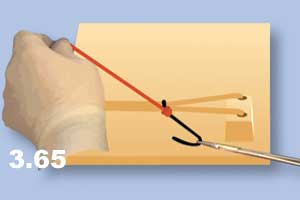
c) Pull the passive strand under the loop (Figure 3.65).
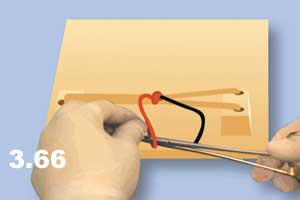
d) Repeat the maneuvers described and form a loop in the opposite direction to make s square know (Figures 3.66 – 3.68).

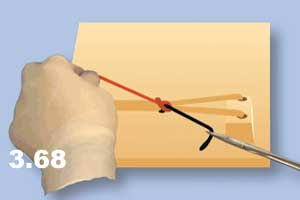
Note: for all diagrams, the active strand is red and the passive strand is black.
Lecture on Demand