Description #
Basic requirements for successful Decontamination of medical devices including the importance of following device manufacturer instructions for use; how to properly preparing the device for transport to a decontamination area; the actual process of cleaning a device. Discussion of the various types of detergents and cleaning agents, how to determine which of those are appropriate for use in health care.
Learning Objectives #
- 1. Discuss the importance of following manufacturer instructions for use
- 2. Describe the steps to take to prepare a soiled device for transport
- 3. Define gross soil
- 4. Describe a suitable transport container
- 5. Outline the 5 steps in cleaning a medical device
- 6. Define soap
- 7. Define detergent
- 8. Describe what enzymatic detergents do
The Basics – Decontamination Area and Handling Devices #
Introduction to Decontamination
The Decontamination area is perhaps the most important area for instrument reprocessing. It is often called the “Dirty” area for good reason. This is where soiled devices are cleaned to prepare them for disinfection and/or sterilization, which will make them safe to use on another patient. The potential for insufficient cleaning, re-contamination of devices, spreading soil and contamination to “clean” areas of the department can be very high if best practices and procedures are not followed. Many harmful chemicals may be used in Decontamination and careful attention to safety procedures here are vital for staff and patient safety.
The physical layout of the decontamination area must allow staff to easily follow best practices for cleaning and infection control.
Ideally the Decontamination area should:
- Have restricted access – anyone who is not required to be in the area should not enter. This helps limit the flow of contamination to other areas of the facility. Keep doors to the area closed!
- Ensure “one-way workflow” of staff and medical devices – this prevents clean items from being re-contaminated or “cross-contaminated”
- Have adequate space for the work being done – if the area is too small and cramped it can be difficult to properly clean devices without contaminating the entire area.
- Be distinctly separate from areas where clean/disinfected/sterile devices are handled or stored – If this is just not possible then staff must be extremely careful to avoid cross-contamination of these items and follow a strict one-way work flow pattern. Every effort should be made to keep clean/disinfected/sterile items out of Decontamination areas.
- Have surfaces that are easily cleaned and disinfected – daily cleaning of surfaces is vital to reduce microorganism growth.
- Have slip-proof flooring that can withstand wet mopping and disinfecting – again daily cleaning is vital in this area.
- Negative air flow – ventilation in Decontamination areas should flow into the area not out into other areas of the facility. This helps prevent air-born microorganisms from flowing out into clean or sterile areas
Instructions for use.
Medical devices used in any area of health care must have instructions for use provided by the manufacturer of the device. These instructions often show how to safely use the device during a patient procedure but they will also describe how to clean and reprocess the device between patients.
Manufacturers are required to carefully test all devices and validate that they can be successfully reprocessed. It is vital that these instructions be followed each and every time a medical device is reprocessed.
All staff responsible for reprocessing medical devices should also be trained in the use of cleaning agents, disinfecting chemicals and any machines used to assist with reprocessing. Many of the chemicals that are used in reprocessing are ineffective if not used correctly, or can even be dangerous if instructions for use are not carefully followed. All staff should have easy access to instructions for all devices, chemicals, and machines as they reprocess any device. Posting instructions on the wall where reprocessing is done can be helpful. Laminating any posted material allows for easy cleaning and can protect instruction sheets from water damage.
Point of Use Preparation and Soiled Transport
Medical and surgical instruments are expensive and represent a major investment for any health care facility. Most of the surgical instruments we see are made of stainless steel, but ongoing development of new procedures and equipment means that many devices are now made of plastic, or silicone, and are often very complex and/or delicate. Damaged equipment and instrumentation represents a danger to patients, and staff, as well as incurring costly repairs or replacement.
Soil, in the form of blood, tissue and other body fluids is very damaging to instruments especially those made of stainless steel. Saline solutions, and the saline found in blood and tissue can permanently damage stainless steel in as little as 15 minutes!
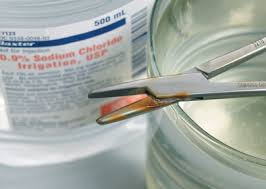
Fig #1 Damaged Instrument
Soil and debris left on complex devices such as flexible endoscopes, make them extremely difficult to clean.
To prolong the life of medical devices and ensure that they can be reprocessed properly, all devices must be cleaned of visible soil immediately after use, in many cases before they are transported to the reprocessing area. It is the responsibility of the user, whether in the OR or in a clinic setting, to keep instruments clean during a procedure, and to pre-clean them prior to sending out for reprocessing.
In this quote from the Association of Operating Room Nurses guidelines document they recommend that:
“Instruments should be wiped as needed with sterile surgical sponges moistened with sterile water during the procedure to remove gross soil. Instruments with lumens should be irrigated with sterile water as needed throughout the surgical procedure.
Blood and body fluids, as well as saline, are highly corrosive. Corrosion, rusting, and pitting occur when saline, blood, and debris are allowed to dry in or on surgical instruments.
Dried blood and debris can be difficult, if not impossible to remove from all surfaces during the decontamination process; therefore, subsequent disinfection or sterilization may not be achieved.” ( 2009 AORN RP: Care of Instruments pg.613)
It is important to pre-clean at point-of-use when gross soil is present. (Gross soil is commonly defined as visible soil and debris.) However, devices should not be allowed to soak in any solution, even plain water, for extended periods such as overnight. This can cause the formation of biofilm which can enclose, and protect microorganisms from disinfection and sterilization processes. As well, prolonged soaking, especially in bloody water, can permanently damage stainless steel instruments. Wiping off gross soil and keeping devices moist with a damp towel or enzymatic foam or gel is the best way to avoid biofilm and damage to instruments.
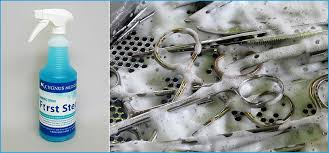
Fig #2 Enzymatic Spray Foam
Here are some tips for the care and handling of instruments after a clinical procedure.
Before you begin:
- Ensure work instructions for medical equipment are available and followed.
- Ensure personal protective equipment (PPE) is available and used as outlined in department policies and work instructions
- Ensure an appropriate selection of water dampened cloth, towel or pre-moistened towelettes are available at point-of-use.
- Ensure transport container is appropriate, available and labeled as “soiled” or “contaminated”
After the procedure:
- Dispose of sharps.
- Perform hand hygiene and don gloves.
- At point-of-use, wipe off gross soil using water dampened, clean cloth or towel, or pre-moistened wipe.
- Wipe from clean to dirty in ONE motion using friction.
- Place in labeled transport container and close lid.
- Remove gloves, perform hand hygiene.
- Transport immediately to designated soiled location, e.g. soiled utility room.
DO NOT use saline or pre-packaged lemon wipes as they cause equipment damage.
DO NOT perform pre-cleaning under running water as it increases the risk of splash exposure.
DO NOT use abrasives or sharp items to pre-clean as they will damage equipment.
Delayed Reprocessing
Sometimes it is difficult to pre-clean instruments after a procedure, or you may not be able to start the decontamination process right away. If cleaning has to be delayed it is vital that soil is prevented from drying and hardening on devices:
IMMEDIATELY upon arrival to the designated soiled location:
- Put on gloves and PPE
- Refer to any work instructions that are available for the devices you are cleaning
- ENSURE EQUIPMENT REMAINS MOIST
- Prepare equipment by moistening using either foam spray, or gel product or water and approved detergent and covering with a damp towel.
- Place equipment in labeled, solid, leak-proof container and close lid as per transport requirements (same container from pre-clean can be used).
- DO NOT allow equipment to dry.
- DO NOT use saline or pre-packaged lemon wipes as they cause equipment damage.
- Remove PPE and perform hand hygiene.
Transportation of soiled devices:
Transport Containers should be:
- Solid (puncture resistant, rigid)
- Leak-proof (gaskets are good)
- Lidded (lids should remain closed
- For safety, and to avoid any confusion, all containers holding or transporting contaminated items, should be labeled “soiled” or “contaminated” and have a bio-hazard label attached.
- After soiled items are removed for reprocessing the container must be disinfected, and should be labeled “clean”
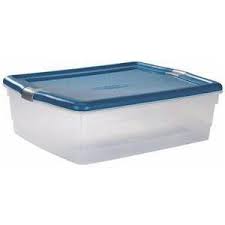
Fig #3 Transport Container
Tips for transporting soiled devices:
- Place heaviest equipment on the bottom of the container
- Place delicate instruments on top of heaviest ones and ensure they are protected from other instruments -in their own protective cases if available
- The holding/transport container should be stored in a designated location that is not accessible by the public and separated from clean and sterile items.
- Transport soiled equipment as soon as possible to reprocessing area or department
- Discard all liquids prior to transport.
- All transport containers and lids must be low level disinfected after each use.
- Transport containers and lids must be allowed to dry prior to next use.
Carts should be considered as a transport option to minimize injury to staff from carrying heavy containers. If you use soiled transport carts:
- they must be enclosed – they have doors or drawers – or they are covered
- open carts – ( no doors ) – must be covered with either reusable covers that are laundered after each use or single use covers that are disposed of after each use.
- Carts must be low level disinfected after every use.
- Carts that have been low level disinfected should be allowed to air dry.
- Do not transport soiled items through areas where clean and sterile supplies are stored.
- Do not transport, distribute or store soiled medical devices and equipment with clean and sterile items.
The Basics of Cleaning in Decontamination #
In healthcare a common definition of Decontamination is: the process of reducing the number of microorganisms on a soiled item to a low level. We may not completely eliminate each and every microorganism but we reduce them to such a low level that they pose no risk to anyone handling a decontaminated item as they prepare if for further processing such as sterilization.
Decontamination commonly involves the two steps of Cleaning and Disinfection
Cleaning is the thorough removal of soil from an item. It is an essential step in reprocessing. If cleaning is not done correctly, and soil remains on an item, subsequent disinfection and sterilization processes will not work. Soil will trap and protect microorganisms from the effects of disinfection chemicals or sterilization methods. We can say that if it is dirty, it is not sterile.
Always remember: No form of disinfection or sterilization will compensate for poor cleaning!!

MDRD Technician working in decontamination area sorting instruments
A successful Cleaning process has 5 steps:
1. Sorting:
As items enter the Decontamination area they are sorted into appropriate categories; disposable items, linen, manual wash items, items that can go into an automated process such as washer/disinfector. We must watch closely for sharps, delicate instruments, and any instruments that disassemble into multiple components. All instruments must be opened and taken apart into their smallest components, so that all areas of the instrument can be exposed to the cleaning process. Follow your facility work instructions on how to disassemble instruments.
2. Soaking:
Devices should be soaked or rinsed as soon as possible after use. If soil remains on any item for too long it will harden and be difficult to remove. Always follow manufacturer instructions for immersing devices. Some electrical or battery powered devices may be damaged by full immersion in water.
Soaking and rinsing should be done in tepid (slightly warm water). Very hot water will coagulate protein and cold water will congeal fats and oils.
Many of the enzymatic detergents we use for soaking and manual washing will also be affected by the temperature of the water. Check the recommended temperature in the manufacturer’s instructions for use on the products in your facility. These instructions will also tell you how long the enzymatic detergent must be in contact with the item for best results, as well as the correct concentration of solution to use. Using too much can be harmful to us and using too little is ineffective.
3. Washing:
Washing is: the mechanical removal of soil. It must involve friction by rubbing or scrubbing in the case of manual (hand) washing; or by the action of the water spray arms in an automated washer. Chemicals such as detergents or enzymatics are often used to assist the process but they can never replace friction. Using friction must be done carefully, however. All scrubbing must be done underneath the water to avoid splashing and reduce the chance of aerosolization.
Aerosolization is the creation of minute droplets of water mixed with soil and cleaning chemicals, and can be very dangerous if they are breathed in. Aerosolization of soil and chemicals can also contaminate counters and freshly cleaned items.
Chemical Agents for Washing We often use the words “soap” and “detergent” interchangeably, however they are two very different substances and this difference is important for our work in Decontamination.
Soaps are organic chemical compounds. They are made from animal fat and an alkali, usually lye. Soaps work well for removing oils and fats. However, they do not rinse off easily from surgical instruments. Any soap remaining on a surgical instrument encourages bacterial growth and can cause serious infection in a patient. Soaps can also react badly with the other chemicals and processes we use. Therefore you will rarely find soap that is approved for use in healthcare device reprocessing.
Household dishwashing liquids are often soap based and should never be used to clean medical devices.
Detergents are alcohol based compounds and are used widely in healthcare. Most of the non-enzymatic detergents we use are “PH neutral” meaning they are neither acid nor alkali. Water hardness and purity will often determine the type of detergent we use. What works well in one facility may not work well in another because of different water conditions. Your detergent sales representative can help you determine the product for your water conditions.
Enzymatic detergents use enzymes to break down, protein, fats, cellulose and starches. Most common enzymatic detergents have several different enzymes in their formulation. Like many of the chemicals we use, enzymatic detergents have an expiry date on the label that must be monitored carefully. Using expired product will not give the required results. Instructions for use are printed on the product label and should be followed. Most require dilution at a certain rate – commonly one ounce to one gallon. Fig #4
Make sure you know the correct amount of detergent for the amount of water in your sink. This is very important for all types of solutions that we have to mix from a concentrate. Too little in the mixture will not be effective, and too much can be harmful to us and to the items we process.
The use of abrasive cleaners should be a last resort. Any abrasive polishes or cleaners must be approved for use with medical instruments. Always follow the manufacturer’s instructions for using these products. Not all abrasives are safe for use in a hospital or clinic setting. Many household cleansers, such as Comet or Bon Ami are not approved for use with the various other chemicals in medical device reprocessing. They can also leave a residue on items that can be very hard to remove. If these residues are not removed completely they could end up inside a patient.
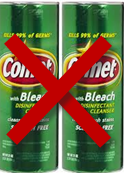
Fig #5 Do not use domestic abrasive cleaners
4. Rinsing
Rinsing is important for two reasons. First, it helps flush away soil loosened by the cleaning process. And secondly it removes any remaining detergent. This is important because many detergents are not compatible with the processes used for disinfecting and sterilizing, and may limit the effectiveness of those processes. Detergent residue can also damage surgical instruments.
5. Drying
If medical devices are going to be disinfected or sterilized after cleaning they must be dried. Excess moisture from wet devices will dilute chemical disinfectants causing them to lose their disinfectant properties. Wet devices in a steam sterilizer will often come out of the process wet and therefore not sterile.
Disinfection is a process that is distinct and separate from cleaning.
Cleaning removes soil and many micro-organisms. Disinfection kills most remaining micro-organisms leaving the item safe to handle.
Before leaving the decontamination area items must be safe for us to handle as we get them ready for further processing in a sterilizer, or as we send them out for use in patient care areas. Careful washing and rinsing should remove enough soil to make devices safe to handle as we prepare them for sterilization. If your facility requires that all devices be disinfected before leaving the Decontamination area you must consider this:
- Any disinfectant we use in reprocessing must be approved for use, not only in the department but on the item we are trying to disinfect.
- Most surface disinfectants that we use on tabletops, floors, or other surfaces are not suitable for disinfecting medical devices that will go on to be sterilized. They may be hard to rinse off and stay on the device even after sterilization.
- All chemical disinfectants have clear instructions for use that we must read and follow
More information on Disinfection is available in a separate units in this series titled Disinfection
Chemical Agents in Decontamination
We often use the words “soap” and “detergent” interchangeably, however they are two very different substances and this difference is important for our work in Decontamination.
Soaps are organic chemical compounds. They are made from animal fat and an alkali, usually lye. Soaps work well for removing oils and fats. However, they do not rinse off easily from surgical instruments. Any soap remaining on a surgical instrument encourages bacterial growth and can cause serious infection in a patient. Soaps can also react badly with the other chemicals and processes we use. Therefore you will rarely find soap that is approved for use in healthcare device reprocessing.
Household dishwashing liquids are often soap based and should never be used to clean medical devices.
Detergents are alcohol based compounds and are used widely in healthcare. Most of the non-enzymatic detergents we use are “PH neutral” meaning they are neither acid nor alkali. Water hardness and purity will often determine the type of detergent we use. What works well in one facility may not work well in another because of different water conditions. Your detergent sales representative can help you determine the best product for your water conditions.
Enzymatic detergents use enzymes to break down, protein, fats, cellulose and starches. Most common enzymatic detergents have several different enzymes in their formulation. Like many of the chemicals we use, enzymatic detergents often have an expiry date on the label or bottle that must be monitored carefully. Using expired product will not give good results. Instructions for use are printed on the product label and should be followed.
We must always ensure that chemicals we use have been approved for use in healthcare and for our own facility processes.
Workplace Hazardous Materials Information System – WHMIS
Info on MSDS and WHMIS training to come…..
Basic Cleaning Guidelines
Many Decontamination areas in large facilities will have automated washing machines to assist in cleaning. However, your facility may not have machines and you will need to do all your instrument cleaning manually. Even in facilities with machines some instruments may need manual cleaning for several reasons:
- Some instruments and devices cannot be immersed in water or are too delicate for the cycles in the washer/disinfector.
- Manual cleaning is also an important step in preparing instruments for loading into the washer/disinfector, especially those with lumens.
We can classify medical devices into 2 basic categories: non-immersible meaning they can not be submerged in water; and immersible which means we can submerge them in water.
If we are manually cleaning non-immersible items: (many of these are powered devices such as drills and saws or other electrical instruments)
- Always follow work or manufacturers instructions.
- Keep all power connections away from water. Do not submerse to soak the item.
- Wipe item with a soft cloth moistened with detergent solution. Use an appropriate sized brush for cleaning any lumens.
- Rinse by wiping with a clean soft cloth moistened with fresh water or rinse carefully, according to instruction, under running water keeping power sources dry.
- Follow department and manufacturer’s instructions for disinfection.
If we are manually cleaning immersible items:
- Always consult and follow work or manufacturer instructions.
- Most of these items can be soaked.
- They should be washed by scrubbing with a soft cloth or brush under the water level to avoid “aerosolization”. (the cloud of solid or liquid particles created by the scrubbing motion)
- Use appropriate sized brushes for any lumens.
- Rinse carefully under running water.
- Follow department and manufacturer instructions for disinfection
Some important guidelines for manual cleaning of any items.
- Make sure you can access all work instructions for any item you have to clean.
- Watch closely for lumens on instruments and make sure they are all brushed, flushed, and rinsed.
- Brushes must be large enough to contact the walls of lumens, but not so large that they have to be forced into the lumen.
- Carefully inspect all cleaning brushes for wear and cleanliness. Throw them out if they look worn. Single use brushes must be thrown out after one use and cannot be washed and reused.
- Reusable brushes should be decontaminated at least once per shift – most medical grade brushes can be put through a washer/disinfector, but household or toothbrushes may not. Always make sure you have manufacturer instructions for decontaminating your brushes.
- Never use a wire brush on any item without specific manufacturer instructions. Wire brushes can damage instruments beyond repair. Steel wool, or abrasive pads and even plastic “scrub” pads will also damage instruments.
- Change cleaning solutions regularly – when obviously soiled or at least once per shift. Consult manufacturer instructions for the solution you are using.
- Many enzymatic detergents work only at a certain temperature. Learn the proper temperature for the detergent you use. Enzymatics that work best in warm or hot water cannot be “reactivated” by adding more hot water once the solution becomes too cold.
- Make sure you know the correct amount of detergent for the amount of water in your sink. This is very important for all types of solutions that we have to mix from a concentrate. Too little in the mixture will not be effective, and too much can be harmful to us and to the items we process.
- The principle of “one way work flow” is very important in the Decontamination area. Items should move from soiled areas to the cleanest areas. It is vital that clean instruments are not “cross-contaminated” by handling them with dirty gloves, or placing them back onto a soiled counter.
- ensure that you are wearing appropriate Personal Protective Equipment (PPE) for all cleaning done in the Decontamination area, and that you remove your PPE before leaving the area.
More information on one-way workflow , cross-contamination and PPE is available in the Infection Prevention Principles unit in this series.
Common Machines in Decontamination. If your facility is large enough you may use one or both of the following:
Washer Disinfectors
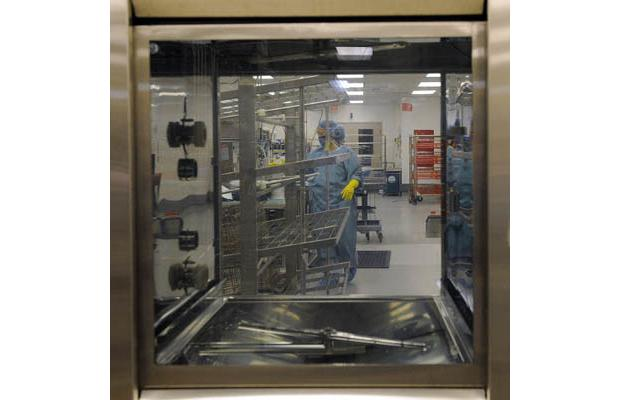
View through a washer disinfector
A common machine in many Decontamination departments is the Washer/Disinfector. They are used for washing surgical instruments as well as basins and instrument cases.
If you are preparing instruments to be put in a washer disinfector remember to remove all gross soil and brush and flush all lumens.
A typical washer/disinfector cycle would be:
- Pre-Rinse. Using tepid – (not hot) water, gross soil is loosened and removed. Sometimes enzymatic solution is added to assist with soil removal. Although the pre-rinse cycle is very good at removing gross soil, nothing replaces soaking/rinsing items prior to loading in the washer/disinfector.
- Detergent Wash Detergent solution is sprayed on the instruments, creating friction that is necessary for thorough cleaning. Water temperature is about commonly 55°C(130°F).
- Rinse A hot water rinse at about 50°C (122°F) removes loosened soil.
- Thermal Rinse A second hot water rinse at a high enough temperature to achieve thermal disinfection. Usually about 90°C (194°F) for 60 to 90 seconds. This disinfection makes the items safe for staff to handle with intact skin.
- Drying The cycle finishes with hot air drying to remove some moisture, but not all. It is important to fully dry items after they come out of the washer to reduce the chance of microorganism growth in pooled water and to prevent water spots.
When using a washer/disinfector it is very important to remember that all surfaces of the items must be in contact with the cleaning solution and the action of the sprayer arms. All instruments must be in their most open position or disassembled if appropriate. The washer cannot clean what it cannot contact. Always check work instructions for disassembly information. Do not over load washer baskets or racks. Wire baskets should be used to allow the action of the sprayer arms to contact all parts of the instruments. Cupped surfaces like bowls must be positioned so that water and detergent solution will not be trapped.
Ultrasonic Cleaner
Often the most underused machine in the decontamination area, the ultrasonic cleaner can be the most helpful tool we have. It uses the action of “cavitation” to loosen soil from hard to reach areas like box-locks, ratchets, coiled wires, and lumened instruments.

Cavitation (Reference CSA Plus 1112)
Cavitation is the action of millions of minute bubbles “imploding” (collapsing inward). These imploding bubbles create a vacuum action that carries soil away from the instruments.
The bubbles are created by an electrical current that the machine converts to high frequency ultrasonic waves. The action of the waves forms the bubbles that increase in size and, eventually implode loosening any dirt around them.
Some important points to remember when using an ultrasonic cleaner:
- The ultrasonic cleaner does not disinfect items
- Items should be put through the washer disinfector or manually washed/rinsed after ultrasonic cleaning to remove loosened soil. Lumens should be brushed and flushed.
- Electrical devices, and items made of rubber should not be placed in the ultrasonic cleaner. Stainless steel should not be placed in the ultrasonic cleaner along with items made of aluminum, brass or copper. This can cause staining and damage. Always check work or manufacturer’s instructions before placing items in the ultrasonic.
- The solution used in the ultrasonic cleaner must be changed regularly, especially if it appears soiled. Dirt in the solution will interfere with the cavitation process. Always use approved detergents in the ultrasonic.
- Any fresh solution must be “de-gassed” before the machine can be used. De-gassing removes any existing bubbles from the solution that would interfere with cavitation, and is accomplished by running an empty cycle.
- Always keep the lid down on the machine during a cycle to prevent aerosolization of the solution.
Glossary Decontamination #
Abrasive – any material or substance that is used for grinding, or polishing
Aerosolization – the creation of minute droplets of water by splashing or agitation of water surface. In an MDRD decontamination are aerosolized water can also contain soil and cleaning chemicals.
Biofilm – colonies of bacteria and other microorganisms that secrete a gelatinous coating that protects the microorganisms from cleaning and disinfecting processes. Biofilms develop when items are in long term contact with water. Extended soaking in water or cleaning solutions can result in biofilm development
Cavitation – Process used in ultrasonic cleaning. Sound waves create tiny vacuum bubbles which implode and draw debris away.
Cleaning – the thorough removal of soil from an item. Cleaning physically removes rather than kills microorganisms
Decontamination – the process of reducing the number of microorganisms on a soiled item to a low level. Accomplished by cleaning followed by the inactivation microorganisms
De-gassing – removing trapped air bubbles in an Ultrasonic cleaning machine. This is done by running a cycle in the machine without any instruments, usually the first cycle of the day.
Detergent – A synthetic cleansing agent that can aid the cleaning process. Detergents used in MDR may contain enzymes
Disinfection – a process that kills most disease producing microorganisms, but not necessarily bacterial spores
Enzymatic – a cleaning agent that contains enzymes and detergent. They are used to loosen and dissolve organic substances such as fats, protein, starch
Enzymes – proteins that produce chemical changes in organic substances such as blood proteins, fats, and starch
Friction – physical action of brushing or rubbing to aid the cleaning process.
Immersible – items that can be put completely underwater with no damage
Lumens – the channel or tube in a medical device such as suction tips,
Microorganism – any organism too small to be viewed by the unaided eye, such as bacteria, viruses etc.
Negative Air Flow – Ventilation system that keeps air flowing into an area rather than out. In an MDRD this prevents contaminated air from flowing into a clean area.
Passivation layer – outer protective layer of chromium dioxide on surgical stainless steel instruments. Can be permanently damaged by abrasive cleaners or wire brushes.
Soap – organic based compounds used for cleaning
Tepid – temperature that is only warm, not hot. Often called lukewarm.
Washing – the mechanical removal of soil
WHMIS – abbreviation for Workplace Hazardous Materials Information System