The key to success and consistency in performing any laparoscopic procedure, including these basic techniques, is to establish a routine.
Pneumoperitoneum
The pneumoperitoneum is the laparoscopists’ workspace. Without the distension of this potential space, laparoscopic surgery is not possible. There are two basic techniques of establishing access to the peritoneal cavity and creating a pneumoperitoneum.
Proponents of the Veress technique argue that it is quick and easy. Surgeons in favour of the Hasson technique counter that it is safer since everything is done under direct vision, and that the rapid insufflation makes up for the extra time required to insert a Hasson cannula compared with a Veress needle. Some surgeons selectively use either technique, using the Veress needle in uncomplicated cases and the open technique when adhesions from previous surgery are anticipated.
- Veress Needle (Closed Technique)
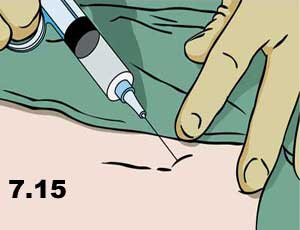
- Infiltratelocal anesthetic below the umbilicus (Figure 7.15).
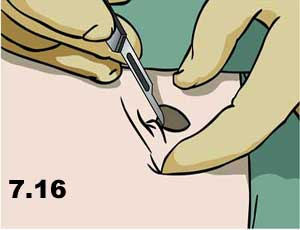
- Make a skin incision the size of the port to be inserted (Figure 7.16).
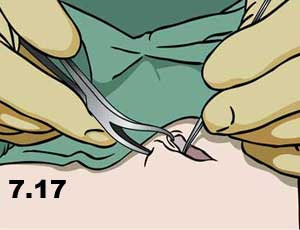
- Grasp the fascia with a hemostat or towel-clip and retract upwards (Figure 7.17).
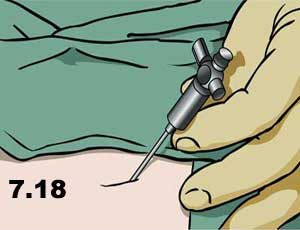
- Insert the Veress needle through all layers of the abdominal wall; there should be two distinct “pops” (Figure 7.18).
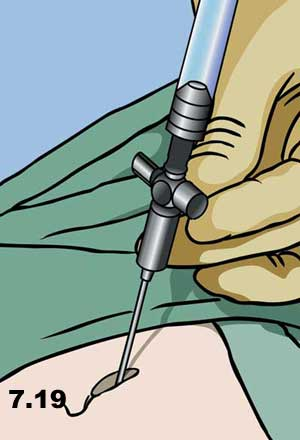
- Tests for intraperitoneal location:
- Aspirate. First aspirate (for blood or bowel content, which would identify a serious trocar-entry complication), then flush with 5 cc saline and aspirate again (Figure 7.19).
- Hanging Drop. Place a drop of saline in the hub of the Veress, then lift the abdominal wall. If the Veress is in place the negative intra-abdominal pressure should pull the drop inwards, and disappear inside the needle.
- Insufflate with CO2, first on low flow then increase when sure that the flow is in the intraperitoneum. This location can be confirmed by percussing over the liver (normal dullness is lost due to the pneumoperitoneum) (Figure 7.20).

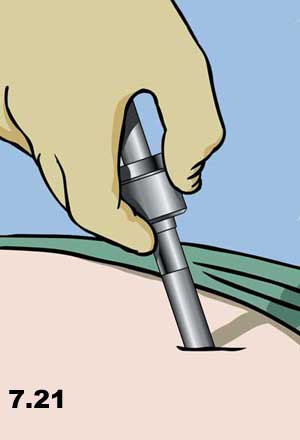
- Insert the first sharp trocar, with the side port open so that the “hiss” of escaping air can be heard when the pneumoperitoneum is penetrated (forward pressure on the port is immediately released, and the side port is closed to prevent loss of the pneumoperitoneum) (Figure 7.21).
2. Hasson Cannula (Open Technique)
- Infiltrate local anesthetic below the umbilicus.
- Make a skin incision 12-15 mm long for a 10 mm Hasson. The thicker the abdominal wall, the longer the incision will be.
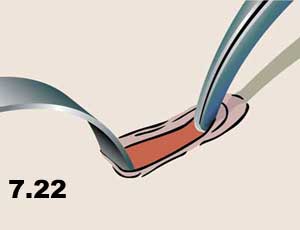
- Grasp the fascia with a hemostat or towel-clip and retract upwards (Figure 7.22).
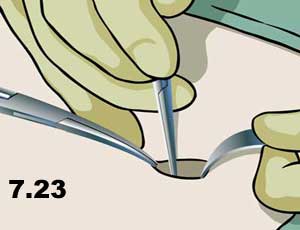
- Make a 10 mm incision in all layers of fascia (the linea alba) (Figure 7.23).
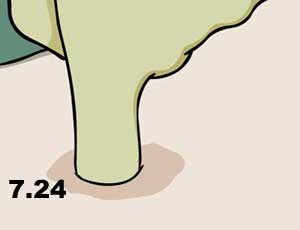
- Open the peritoneum (either sharply between two hemostats, or bluntly with the gloved finger) (Figure 7.24).
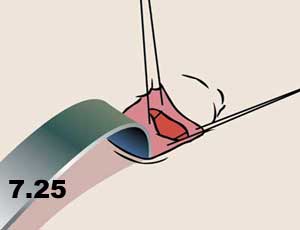
- Place “stay sutures” in the fascia which will be used to achieve a tight seal between the abdominal wall and the cannula to prevent gas escape. Place the sutures so that they can be used to close the fascial defect after the procedure (to prevent a trocar site herniation) (Figure 7.25).
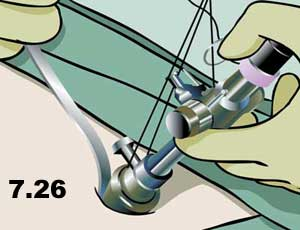
- Insert the Hasson using an S-retractor to visualize the path into the peritoneal cavity (think of this as “intubating” the peritoneal cavity). (Figure 7.26).
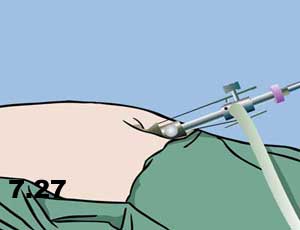
- Fasten the Hasson in place with the stay sutures and insufflate with CO 2. High flow can be used immediately as the intraperitoneal location is visualized directly (Figure 7.27).
Basic Laparoscopic Skills #
Basic Laprascopic Skills
As with traditional surgery, the basic principles of laparoscopic surgery are traction and counter-traction, and meticulous sharp and blunt dissection. The difference between the two is the very fine hand movements required for laparoscopic dissection, as instruments are restricted in movement around a fulcrum at the abdominal wall.
Very basic surgical techniques such as knot-tying therefore become much more difficult. In fact, many surgeons would realistically consider laparoscopic intracorporeal knot-tying an advanced laparoscopic technique. It is definitely a prerequisite skill for advanced laparoscopic surgery (i.e. in general surgery, anything beyond cholecystectomy, appendectomy, or inguinal hernia repair).
Due to the difficulty of laparoscopic suturing, novel techniques have developed for laparoscopic hemostasis (e.g. “endoloops”) and other traditional techniques have adapted to laparoscopic surgery. Only those skills which are important or unique in laparoscopic surgery will be described in this section. These skills can be practiced in dry (inanimate) and wet (animate) labs.
a) Transfer. Hand-to-hand transfer of a needle from right hand to left hand and vice versa. Hand-over-hand movements required to “run the bowel” can be simulated by a piece of string in a laparoscopic practice box.
b) Clipping a Vessel. The basic principle of having the tips of the instrument in view at all times is paramount. The surgeon must see the tips of the clip during application (Figure 7.28 – 7.30).
.
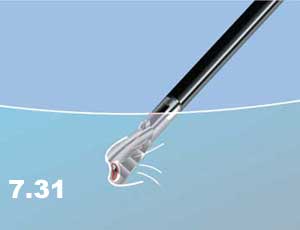
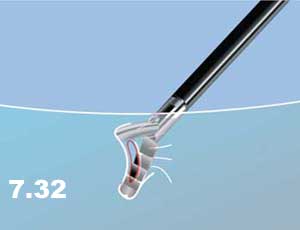
c) Dissection. Sharp or blunt dissection with or without cautery, as in open surgery (Figures 7.31 & 7.32)
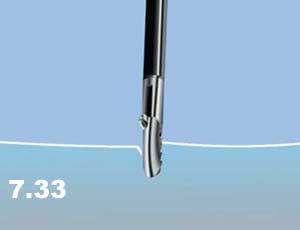
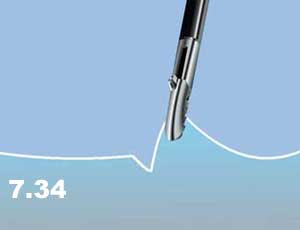
In addition, tissues are picked up, lifted away from surrounding structures, coagulated, and then stripped away to expose the underlying structure (Figures 7.33 & 7.34)
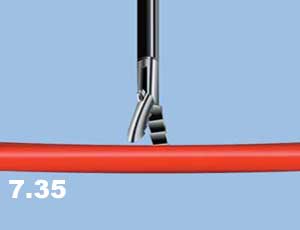
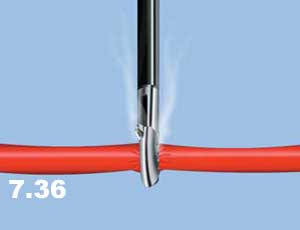
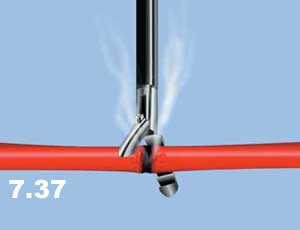
Small vessels can also be grasped, cauterized, and then sharply divided with scissors (Figures 7.35 – 7.37).
d) Applying an Endoloop
- “Backload” the endoloop into the reducer.
- Insert the endoloop into the abdomen.
- Place the loop over the target structure to be ligated.
- Grasp the target with a ratcheted instrument in the other hand, and provide counter-traction (the assistant holds this instrument so that the surgeon can use two hands on the endoloop).
- Snap off the end of the endoloop, place the tip of the holder on the desired position of the ligature and smoothly pull the suture to snug down the loop.
- Cut the suture and remove the endoloop holder. Small vessels can also be grasped, cauterized, and then sharply divided with scissors.
Laparoscopic Suturing #
Laprascopic Suturing
Curved needles are commonly used for suturing in open surgery. Some surgeons prefer short, straight needles or ski-tip needles when they are learning laparoscopic suturing techniques.
1. Intracorporeal Knots.
Intracorporeal knots are laparoscopic instrument ties formed completely within the peritoneal cavity. This is essentially an instrument tie, as in open surgery, but it is much more difficult to do laparoscopically. Due to the technical difficulty of this basic laparoscopic skill, many surgeons have abandoned it in favour of the easier extracorporeal suturing. As with any skill, intracorporeal knot-tying can be mastered with practice.
- Insert the suture (trimmed to a length of about four to six inches) into the abdomen and grasp it in the needle holder (positioned at a right angle to the jaw of the needle holder)
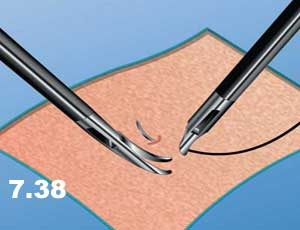
- Pass the needle through the tissue (Figure 7.38)
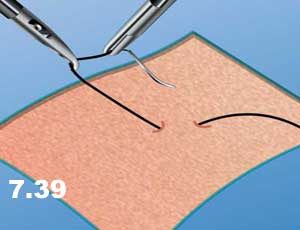
- Pick up the needle with the second instrument (second needle holder or a swan-neck grasper) and turn over 180 degrees so that the point faces the direction from which the needle came (to reduce the risk of inadvertent injury with the needle while pulling the suture through (Figure 7.39).
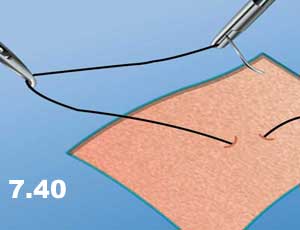
- Pull the suture though the tissue in the direction of the needle path (to minimize tissue trauma – as in open surgery) leaving a “tail” of one or two inches of suture protruding from the tissue (Figure 7.40).
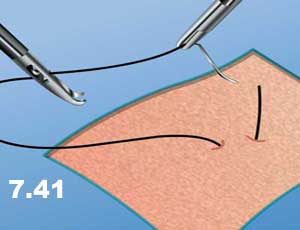
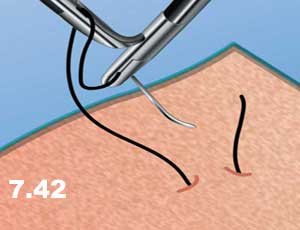
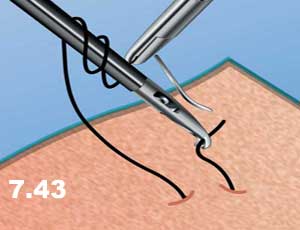
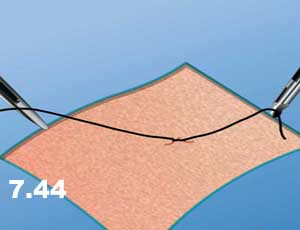
- Grasp the suture just beyond the swage (Figure 7.41) and a C-shaped curve is formed with the suture. The needle end of the suture is then wrapped around the second instrument twice (Figure 7.42) , the tail is then grasped (Figure 7.43) , and the knot is laid down flatly, as with an open instrument tie (Figure 7.44).
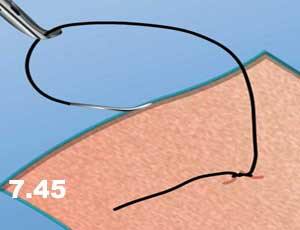
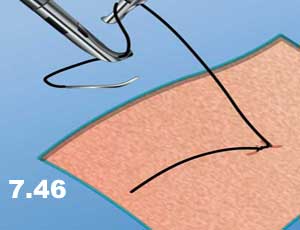
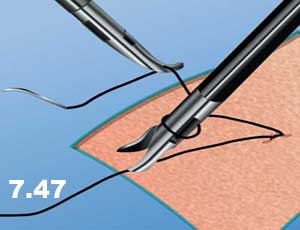
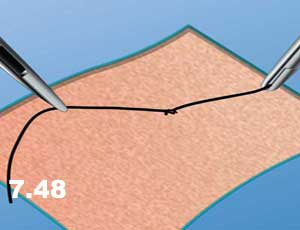
- Tighten the first knot and then hand the suture to the opposite instrument and tie a single knot in the opposite direction, resulting in a square knot. At least three knots are usually placed (Figures 7.45 – 7.48). Cut the suture and remove excess.
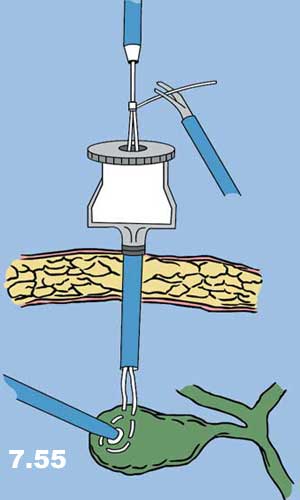
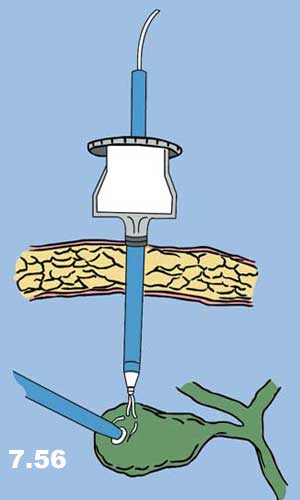
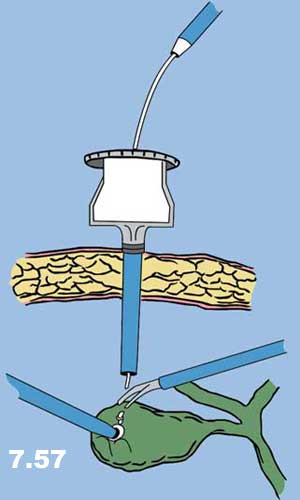
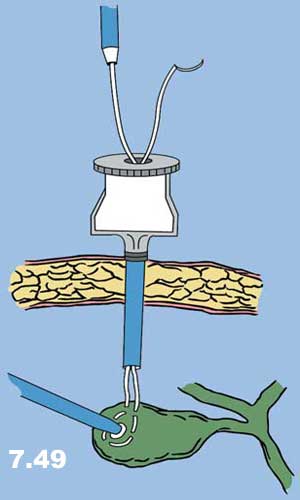
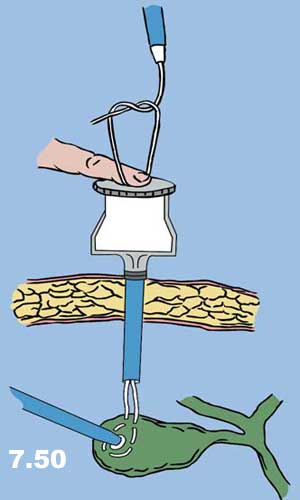
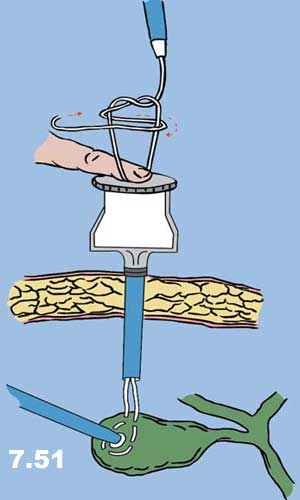
2. Extracorporeal Knots.
As the name implies, extracorporeal knot-tying involves the tying of knots outside of the body: The suture and needle are passed into the abdomen, placed through the tissue, pulled out of the abdomen, tied, and pushed back into the abdomen and snugged down. There are two basic types of extracorporeal knots: extracorporeal slip knots and extracorporeal surgeon’s knots (Figures 7.49 – 7.57).
- Insert the suture into the abdomen and grasp it in the needle holder (positioned at a right angle to the jaw of the needle holder).
- Pass the needle through the tissue.
- Grasp the suture behind the swage and pull the needle and the suture back into the trocar sheath through which it was inserted.
- Tie a single knot, while the assistant holds a finger over the trocar sheath opening in order to prevent the escape of gas.
- Use a knot-pusher to push the knot down through the cannula, and onto the tissue (the knot-pusher should be considered an extension of the surgeon’s finger, used to push knots down in open surgery). If the surgeon does not wish to use a slip knot, then a surgeon’s knot is pushed down, and two or three additional knots are tied and pushed down in succession.
- Cut the suture and remove excess.

.