SurgicalSim #
 #
#
Description #
This is an introductory unit that provides the important information on the set up and clinical features of the SurgicalSIM in order to enhance the comfort level of the trainees in the simulation environment and help them to acquire the technical skills to use the simulator more effectively.
Learning Objectives #
At the end of this unit trainees will master the use of SurgicalSIM which includes the following:
1. SurgicalSim setup and supporting equipment
2. Room Policy and safety precautions
3. Technical and Functional aspects of SurgicalSIM
4. Clinical Aspects of the SurgicalSIM
SurgicalSim Setup and Supporting Equipment****** #
This section will help you to get familiar with the simulation environment by providing the information on the set up of METI SurgicalSim and the equipment that is available during the simulated sessions.
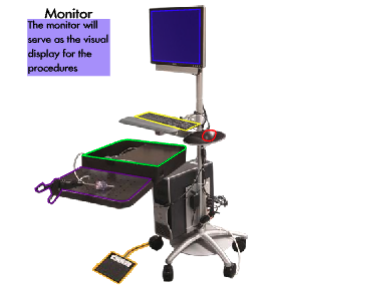
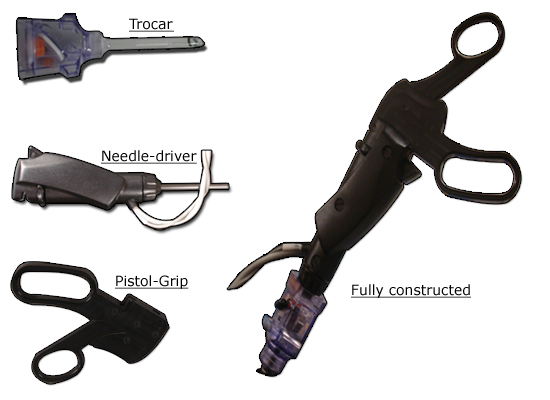
The simulator is accompanied by two sensor units. These are the devices that are used as the tools. The different handle attachments (needle-driver grips, thumb activated pistol grips, camera housing) are attached to these devices and then the simulator simulates these devices in a 3-D environment.
Room Policy and safety precautions #
This section provides the information on simple care and maintenance steps that will help to ensure the simulator stays in good working condition.
Each time you use the simulator:
- When removing the sensor pods, ensure that the cords are in the grooves to avoid them being damaged by the lid.
- Do not force the tool handles onto the sensor pods. They attach very easily; they may be upside down so turn them right side up.
- Do not lean on the simulator.
- NO FOOD OR DRINK IN SIM Room.
Troubleshooting: #
- If anything is not working get a technician.
- If further instruction is needed in how to operate the system, please ask CanHealth staff for more clarification.
Technical and Functional aspects #
In this section, we will first introduce the Surgical Sim and supporting technical equipment through images. After completing this unit, we want you to be able to recognize each component of Surgical Sim and be able to use each component properly. As well you should be able to start up the simulator and also to be able to shut it down properly. Click on Next Page on the top or bottom of the screen, or use the Content Navigation window to the right of the screen to access the startup and shutdown procedures for Surgical Sim, followed by the comprehensive instructions on the use of the accompanying peripheral devices and software. If at anytime you have a question, please ask CanHealth staff immediately.
Start-Up and Shut-Down Sequences #
This section will inform you on the proper start-up and shut down sequences, which are quite simple.
Start-Up Sequence
Software Navigation**** #
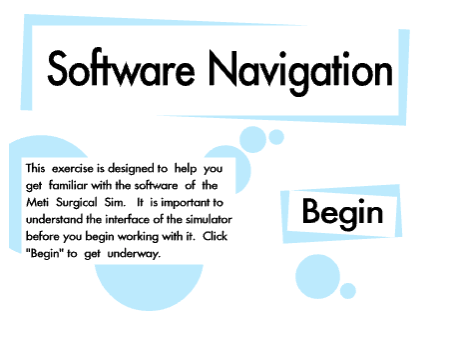
This section will describe the proper use and navigation of the software
Saving Data #
Once you have finished a scenario your data that accords to your performance has been saved so that you may review it at a later date. You can review your report and see how you did on the most recent procedure as well as revue your past procedures. This information is accessible via, the My Info tab on the top of the screen or via the procedure specific information is accessible in the Results tab of the chosen procedure.
Tool Usage #
Clinical Aspects #
Simulation Constraints: #
There are no haptics involved with the training (No sense of touch or force feedback). Therefore the transition from the trainer to actual surgery will in fact feel quite different. The simulator is a device that will train the user in the techniques of laparoscopic surgery.
Types of Lessons: #
The user account will have been assigned a set of lessons when it was set up. The standard for a lesson is that it contains six tabs. Progressing along one tab at a time, the lesson will inform the user on the exercise that they will undertake and how it translates to real life surgeries. After the user has completed the exercise they will receive a report, which will indicate how many if any errors occurred and will keep a record to show a graph of how the user has improved as the lessons progress. The full list of available lesson categories is as follows:
- Camera Navigation
- Instrument Navigation
- Basic Suturing
- Advanced Suturing
Camera Navigation #
Clinical Features-Camera Navigation #
Visualize target with zero degree scope. Learn how to use a straight scope to visualize the target object.
Visualize target with thirty degree scope. Learn how to use an angled scope to visualize the target object.
Visualize and grasp target with zero degree scope. Learn how to use a straight scope to visualize the target and keep the scope steady as you grasp the target with the opposite instrument.
Visualize and grasp target with thirty degree scope. Learn how to use an angled scope to visualize the target and keep the scope steady as you grasp the target with the opposite instrument.
Instrument Navigation #
Clinical Features – Instrument Manipulation #
Retract Tissue: Learn how to grasp and retract tissue precisely and with the right amount of traction. Grasping hand is alternated between the repetitions.
Retract and dissect tissue: Learn how to grasp and retract tissue to obtain the optimal plain of dissection, and simultaneously dissct the tissue with the opposite hand.
Traverse tube: Learn how to traverse a flexible tube with two grasper instruments.
Place arrow: Learn complex bi-manual manipulation by grabbing an arrow shaped object ad placing it inside another object.
Apply clips on cystic duct and cystic artery: Learn how to retract the gallbladder with one instrument and simultaneously dissect the gallbladder away from the liver bed.
Basic Suturing #
Clinical Features – Basic Suturing #
Pull suture to adjust needle: Learn how to obtain optimal needle orientation by pulling the suture with the opposite instrument.
Push needle to adjust needle: Learn how to obtain optimal needle orientation by pushing the needle tip with the opposite instrument.
Free adjust needle: Learn how to obtain optimal needle orientation by pulling the suture or pushing the needle tip with the opposite instrument.
One handed stitch: Learn how to set a stitch by using the same instrument for piercing the tissue and pulling out the needle.
One handed stitch with traction: Learn how to set a stitch by using one instrument for stitching and one instrument for tissue traction.
Two handed stitch: Learn how to set a stitch using one instrument for piercing the tissue and the other instrument for pulling out the needle.
Two handed stitch with traction: Learn how to set a stitch by using one instrument for piercing the tissue and one instrument for initial tissue traction and for pulling out the needle.
Advanced Suturing #
Clinical Features – Advanced Suturing #
Abstract square knot: Learn how to perform an intracorporeal square knot in an abstract enviroment with visual guidance.
Abstract surgeons knot: Learn how to perform an intracorporeal surgeons knot in an abstract enviroment with visual guidance.
Abstract free knot: Learn how to perform an intracorporeal free knot in an abstract enviroment with visual guidance.
Realistic surgeons knot: Learn how to perform an intracorporeal surgeons knot in a realistic enviroment with visual guidance.
Realistic free knot: Learn how to perform an intracorporeal free knot in a realistic enviroment with visual guidance.
Abstract continuous suture: Learn how to perform a continuous suture in an abstract enviroment.
Abstract interrupted suture: Learn how to perform an interrupted suture in an abstract enviroment.
Realistic interrupted suture: Learn how to perform an interrupted suture in a realistic enviroment.