GI Mentor #
#
Description #
This is an introductory unit that provides the important information on the set up and clinical features of the GI Mentor II in order to enhance the comfort level of the trainees in the simulation environment and help them to acquire the technical skills to use the simulator more effectively.
Learning Objectives #
At the end of this unit trainees will master the use of GI Mentor II which includes the following:
1.GI Mentor II setup and supporting equipment.
2.Room Policy and safety precautions
3.Technical and Functional aspects of GI Mentor II
4.Clinical Aspects of GI Mentor II
GI Mentor II setup and supporting equipment #
This section will help you to get familiar with the simulation environment by providing the information on the set up of Simbionix GI Mentor II and the equipment that is available during the simulated sessions.********
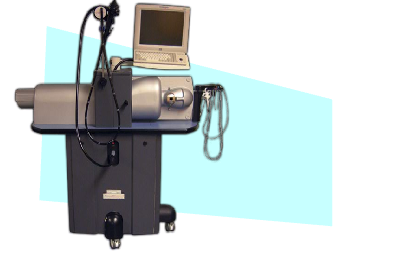
The simulator is accompanied by two scopes, one of which can be attached at a time and each performs different tasks. ******

The endoscope has the camera attached to the front of the scope and admits one diagnostic tool at a time.
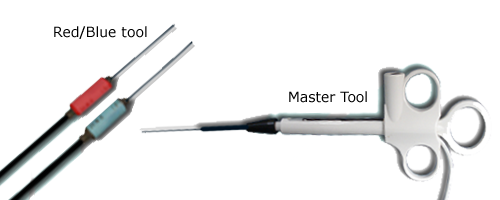
The master tool will serve as the sole tool to insert into the endoscope. It will be accompanied by the red and blue tool when the duodenoscope is in use.

If any tool requires electricity this is provided by the Tool foot pedal. The fluoro foot pedal will provide the fluroscopic image while the duodenoscope is in use.*****
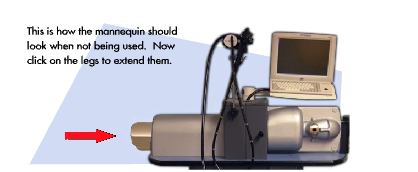
When the simulator is in use be sure to extend the manikins legs to their full length.
The manikin has both oral and anal entries. To switch from one to the other pull the plug out as far as possible and then rotate the manikin, once the desired entry point is on the front let the plug go and rotate the manikin until it locks into place.
Startup and Shutdown Sequences #
This section will inform you on the proper start-up and shut down sequences, which are quite simple.
Start-Up Sequence
Before we start the simulator, we must verify that the Endoscope and Master tool are connected to the simulator.*******
Shut Down Sequence
We must begin the shut-down sequence by removing all tools from the simulator and replacing all equipment in the proper locations.******
Software Navigation #
This section will describe the proper use and navigation of the software, as well as detail the combined use of the software with the accompanying equipment.
Beginning Work with the Simulator: #
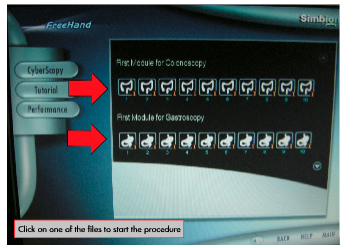
When we have logged into the GI Mentor II simulator the Main Screen will open as seen bellow. Take a moment to become familiar with the interface, and then move on with the unit.
Working with Virtual Patient Case: #
We will begin by exploring the patient case, wherein we learn important facts about the procedure we will be performing. We will also become acquainted with the Heads Up Display of the GI Mentor. This screen is where you will be spending most of your time, so it is important to take a moment to familiarize yourself with its various components.
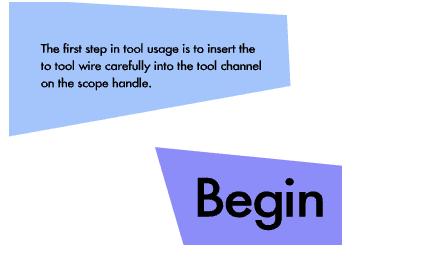
Working with Tools: #
When we require the use of a tool, we must insert the tool a few centimeters into a tool channel until the tool selection window appears. We now click on the desired tool, it wil appear ahead of the endoscope and we are now free to begin using it. If the tool that we have chosen requires electricity we may activate it by pressing the Tool foot pedal. When we have finished with the tool, we gently remove it from the tool channel to finish. The master tool is the only tool used in the endoscope, while the duodenoscope may be accompanied by the guidewire and catheter.
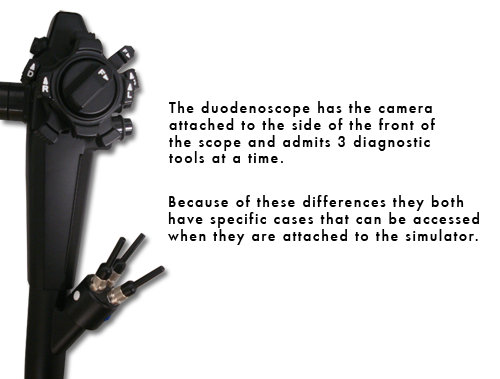
ERCP procedures require the use of a duodenoscope, which employs a side view camera, as opposed to other Upper and Lower GI procedures, which employ a forward viewing endoscope. When beginning procedures using the duodenoscope we must keep in mind that the camera does not expose the anatomy ahead of the scope, but rather to the side of the scope tip. The ERCP cases are grouped at the rear of the cases and display with the “biliary tract” icon. When a case has been started the simulation window will show the simulated endoscopic view on the left and a simulated fluoroscopic view on the right. The fluoroscopic image will not appear in the circle on the right until either the X-ray button or the X-ray foot pedal is pressed.
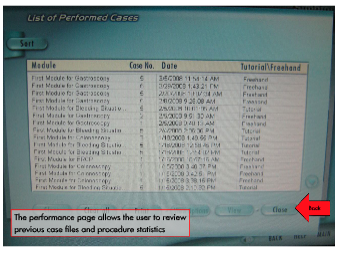
Saving Data #
Once you have finished a scenario your data that accords to your performance has been saved so that you may review it at a later date. You can review your report and see how you did on the most recent procedure as well as revue your past procedures. This information is accessible via, the My Info tab on the top of the screen or via the procedure specific information is accessible in the Results tab of the chosen procedure.